I know I’ve been a little absent the past couple of weeks. We took a family vacation down to San Diego, a trip that included a lot of firsts for the girls. First plane ride, Sea World, first wedding, just to name a few! We ran the girls around and exhausted them, but we had a lot of fun! We were flying down to see my college roommate get married, I love the fact that while we don’t talk everyday and haven’t seen each other in 10 years (!!!) we can still get together and have a wonderful time. I’m touched that she thought of us and included us in her beautiful wedding to a wonderful guy. On a side note, when we were roommates in college, we regularly played tricks on each other. I recall one time she put a used toothbrush that SHE FOUND in my backpack. Imagine my horror on finding that in the middle of class when I was innocently reaching for a highlighter. My senior year, while my parents were visiting to watch my dance ensemble performance, my mom gave me some flowers in a rather hideous vase. I’m sorry, Mom, it was so sweet of you to give me flowers in a point shoe shaped vase! This vase became an inside joke between L and I and we ended up hiding it in each others stuff, houses or care packages to each other. I shipped it to her years ago and assumed it was long gone until I found it in my suitcase. Damn it! I know she had help from my husband, I feel so betrayed. Yet I feel so loved that L kept that ugly vase for all these years and moves. It must say something about our relationship or perhaps it speaks more to the lengths we will go to, to get back at one another.

M posing with the vase. If any of you have any dastardly ways I can get this back to her besides in a package please tell me!
Here’s a few of my favorite shots from the trip.
Of course after you return home from your vacation, you then naturally feel like you need to go on vacation again as you’re stuck washing clothes, unpacking, trying to get back on schedule and a bevy of other things. Not to mention we only had one day to recover before we sent the girls to school! Yes, school, minus commuting time, that is 3 hours all to myself! Squee! Not like I have a problem filling the time, it goes by in an instant! Now I’m subjecting you to shots of the twins on there first day. Bear with me, proud mommy moment!
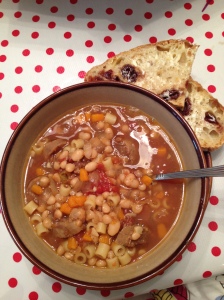
I actually managed to get a few Pinterest recipes done this last week even though we were in California for part of it. So here is an abbreviated version of my weekly pinterest round up. Fall is upon us, so I’ve been craving soups, stews, slow cooked meals and crusty freshly baked bread. Even though the day was warm, I decided to try this slow cooker Sausage, Bean and Pasta stew that I pinned. This link will take you to the pin. The prep for this stew was super fast and required no precooking, a pet peeve of mine when it comes to slow cooking anything! The only thing I didn’t like about the stew is that is sucked a lot of the flavor out of the sausages, leaving them a little bland. Still I would make it again, it tasted even better the next day.
To go with the soup I wanted to make a loaf of bread and I’ve been dying to make some bread in my dutch oven after I saw a person I follow on instagram post pictures of her amazing results.
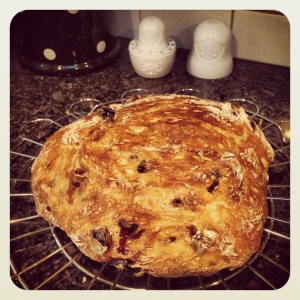
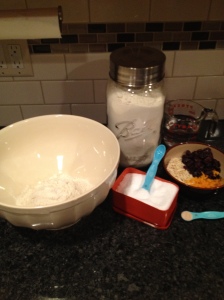
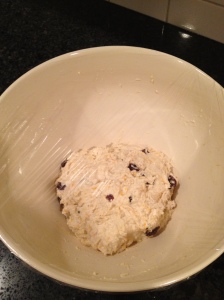
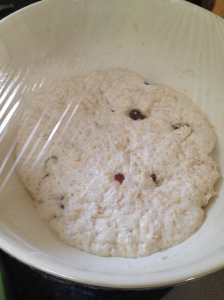
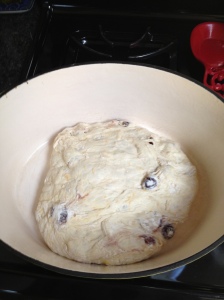
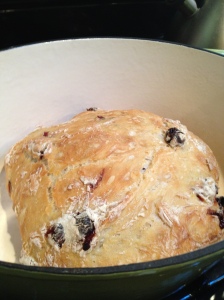
I pinned the website she used for the recipe and have been waiting for it to cool down a bit. I was also little intimidated by the recipe because it rises at room temperature for over half a day, which requires a lot of pre-planning on my part. I ended up mixing the dough at 10pm the night before I needed it and baked the next day at 11am and literally pulled the thing out of the oven, threw it on a cooling rack and raced out the door to pick up the girls. Simply So Good blog has several variations on a wonderful recipe. I went with the cranberry, almond and orange route, but substituted in dried cherries which I’ve been really into lately! Here’s my photo progression of a very successful pin!
The bread really was so delicious. The blogger has some wonderful looking variations with add ins like gruyere cheese, lemon zest and rosemary. That savory version would have gone better with the soup, but the husband wanted the other one.
Now finally on to my Chicken Pot Hand Pies. This recipe can really be used to make a standard chicken pot pie, free form hand pies, muffin pan pot pies or whatever else you can dream of. The way I made them today I ended up with some extra filling, which you can use to make more chicken pot pie, freeze for later or perhaps use as a filling for the biscuit muffins I did a few weeks ago. I made a recipe of Martha Stewart’s Pate Brisee recipe, which makes enough dough for two crusts. If you’re making hand pies you may want to make a 1 1/2 times recipe. Feel free to use store bought dough as well!
Chicken Pot Pie (Hand Pies and beyond)
Crust
Pate Brisee recipe via Martha Stewart (you can double this if you want to use all your filling if making hand pies)
- 2 1/2 cups all-purpose flour
- 1 teaspoon salt
- 1 teaspoon sugar
- 1 cup (2 sticks) unsalted butter chilled and cut into small pieces
- 1/4 to 1/2 cup ice water
- In the bowl of a food processor, combine flour, salt, and sugar. Add butter, and process until the mixture resembles coarse meal, 8 to 10 seconds.
- With machine running, add ice water in a slow, steady stream through feed tube. Pulse until dough holds together without being wet or sticky; be careful not to process more than 30 seconds. To test, squeeze a small amount together: If it is crumbly, add more ice water, 1 tablespoon at a time.
- Divide dough into two equal balls. Flatten each ball into a disc and wrap in plastic. Transfer to the refrigerator and chill at least 1 hour. Dough may be stored, frozen, up to 1 month.
Filling
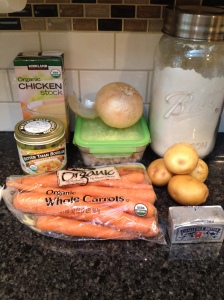
- 1 stick of butter
- 1 onion chopped
- 2 medium potatoes, peeled and cubed (I used 4 small)
- 2 carrots, peeled and rough chop
- 1 cup frozen peas
- 2 cups of chicken broth
- 1 boullion cube or like item (I like Better than Boullion)
- 3-4 cups pre-cooked chicken (I use the breasts from a rotisserie chicken)
- 1/3 cup flour
- 2 T heavy cream
- salt and pepper
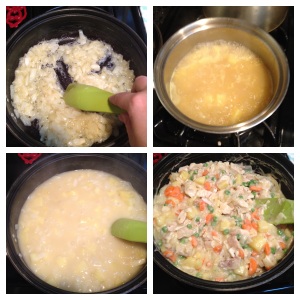
Put broth in a sauce pan, add boullion and heat to a simmer. Add chopped potatoes and cook until almost tender but still slightly undercooked, 10-15 minutes. In the meantime, melt butter in a large pan over medium heat. Add chopped onions and cook until translucent but not brown, 10-15 minutes. Add flour to onions and butter, stirring constantly, cook for 1-2 minutes, until the raw flour odor goes away. Pour in the broth/potatoes into onion mixture. Cook until mixture thickens and starts to bubble. Season with 1 t of salt and a dash of pepper. Add in 2 T of heavy cream (it adds a wonderful richness, you know in addition to that stick of butter.) Add in carrots, chicken and peas. This makes a chunky filling, you can add more broth if you want. Feel free to throw in your favorite vegetables. Sometimes we throw in edamame or whatever else we have on hand.
Take filling off heat and let cool. This is a pretty important step. If you put the hot filling on your pie dough (you know like I did) your dough can become misshapen and tear. If I was more on top of it, I would have pre-made my filling earlier as well as my crust. That way working with colder components, the crust would have baked up a little better.
Preheat you oven to 425 degrees and quickly roll out your dough. You can either make a single large pot pie, free form hand pies (rolling, cutting the dough into rectangles add filling and fold over before sealing) or try one of those handy kitchen gadgets that crap up our kitchens, but actually worked surprisingly well!
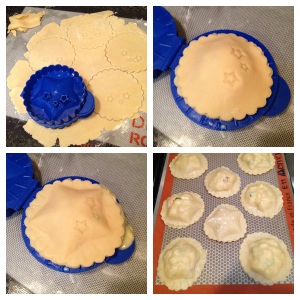
1. Cutting pie dough with unnecessary but totally awesome hand pie accoutrement 2. Forming pie
3. Post pressed pie 4.Ready to bake
Lay on your Silpat or cookie sheet lined with parchment, brush the pie with cream or a beaten egg and bake for 15-20 minutes for hand pies or 30 minutes for a single pie.
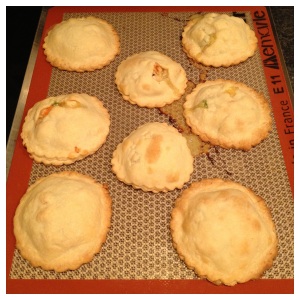
Voila! You will notice the star shape that was on my pie mold, completely baked out of the pie. My dough and filling were way to warm.
Have a great week!


