Bon Appetit!

Julia and Paul Child

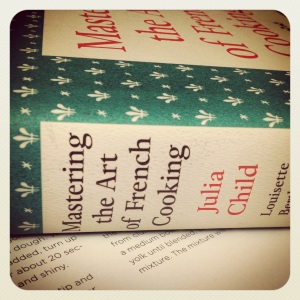
Did you just say that in your best Julia Child voice? Today was Julia Child’s 100 birthday, to celebrate I thought I would try to make something out of her first cookbook. I know Julia’s gotten quite a bit of play over the last few years, largely in part to the movie, Julie and Julia. I did like the movie, and I had previously read both books that inspired the movie. Did you know it is based on two books? The first is, My Life in France by Julia Child and Alex Prud’Homme,  is a wonderful story detailing much of Julia and Paul Child’s life overseas and in France. Basically all the Julia parts in the movie were based on this book. I highly recommend reading it! The other book is, Julie and Julia by Julie Powell, detailing Julie’s year cooking every recipe in Julia Child’s cookbook, Mastering the Art of French Cooking and blogging about it. An o.k. book, but I think I’m just cheesed off that I didn’t think of it first. For me I found Julie Powell a little unsavory as a person, thus I didn’t like her book as much. Then they have Amy Adams play her character in the movie and she’s adorable so it’s hard to not like her. I did read Julie Powell’s second book, Cleaving, and I’m a little ashamed to say that I wrote such a scathing review on Goodreads about it, I feel just a little guilty. Then again, I had to waste my time reading the book.

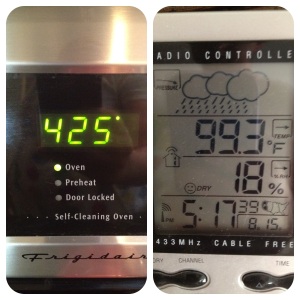
I digress, I’m here to celebrate Julia, so I used her pate choux recipe and made cream puffs. I used a filling recipe from Flour by Joanne Chang, what she uses in her eclairs and cream puffs. Then I topped it with a simple chocolate ganache, 1 part cream to 2 parts chocolate. The whole project left me a little harried because I decided to bake on the same day I had to clean the whole house and it was 100 degrees outside. Yikes, but I really shouldn’t complain, I got to eat a cream puff.

The things I do for you Julia!

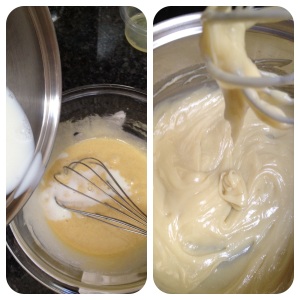
Making the custard base for the filling.

I have to be honest here, I have made this filling before, but this time I found that it turned out very gummy. It tasted good and it wasn’t grainy. It was very firm after it chilled, so I ended up throwing it in my mixer and adding some cream to loosen it up a bit. It had to be soft enough to fold in with whipped cream. Luckily the fix worked.

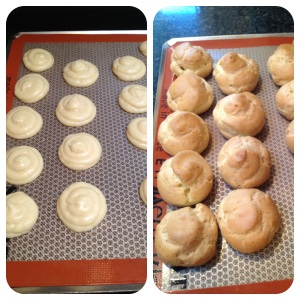
Making the pate choux. Easier than you think!

The puffs, before and after baking. Success!

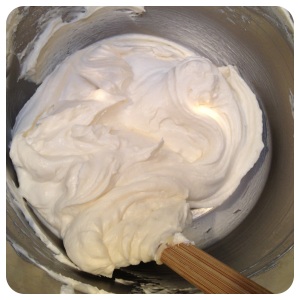
This is the filling, the custard mixed with whipped cream, then piped in the into the puffs.

Bon appetit and happy birthday to a wonderful lady!

One of my girls, licking her plate clean.

In my last post I may have mentioned that I was going to attempt to have a garage sale with only 3 days to prep. I have since seen reason and decided to have it in September. I’m not totally crazy! Next post I’m sharing a chili recipe with you that has finally gotten my husband’s approval. It only took ten years to find it!

Weekly Pinterest Successes and a Fail Update

Today was the last day of volunteering at my church garage sale, what a ride! I have to say it was a lot of hard work but any excuse to organize crap that isn’t my own is a win in my book. Now, since I’m all motivated and on an organizational high, let us hope that I can use it on the garage and my craft room.

Remember the seed bomb project I did a few weeks ago? I wasn’t sure if it would be successful because some of the seed bombs had started molding. I was testing them for a friend as a possible wedding favor. Well I planted a couple of the moldy ones and guess what happened?

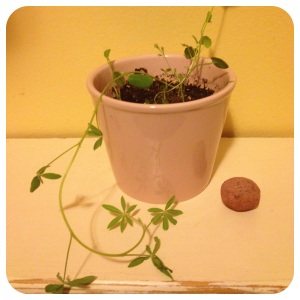
It grew! Success!

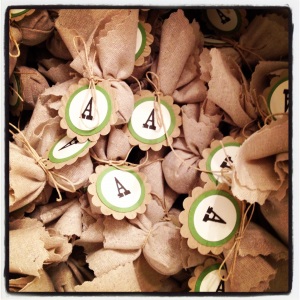
We ended up making another couple of batches and added less water, making it almost a damp crumble, but still easy to roll into a clay ball. Over two hundred seed bombs later, three people and staying up till almost 3am, we got them all done and packaged up. So I would say this Pinterest project became a success!

All done!

I had a meeting for Demarle at Home this week, which means cupcakes. I always bring cupcakes, sometimes a cake, but if I don’t show up with something they may not let me in! Not really! I really do it for selfish reasons, I love to bake and I love to see people enjoying my food. So I’m not doing them any favors really, all my guinea pigs and food testers are helping me. I’ve been eying a particular cupcake recipe on Pinterest, but was waiting for blueberry season. So here is the  link to the wonderful recipe for lemon blueberry cupcakes with a lemon curd filling and a mascarpone frosting from There Goes Cupcake.

Get in my belly!

I only changed a few things, and got a yummy cupcake. This is a big recipe and will make 2 dozen cupcakes. I ended up baking a pan of 20 mini muffin cupcakes and about 10 full size cupcakes. I followed her cupcake and frosting recipe and I made a 1.5 version of the lemon curd. She suggested doubling it if you like a lot of filling, but it would have taken 12 egg yolks and I had to leave a few eggs for breakfast!

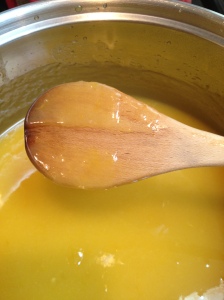
Lemon curd at proper consistency, coats a back of a wooden spoon.

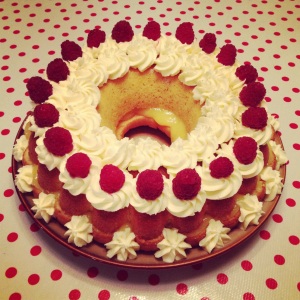
I had leftover lemon curd anyway and no complaints from me. It took all my self control to not eat it with a spoon…in front of my fridge…with the door open. I also had a lot of leftover frosting, since my family was visiting, I thought I would bake a cake mix cake and fancy it up with some of my leftovers yummies. When I made the lemon curd, I sieved it and was left with a pile of candied lemon zest. I saved it and added it into my cake mix giving it a little extra zing. I also beat the heck out of my cake mixes in my stand mixer, waiting until they turn pale yellow before I bake them. I think it gives them a lovely pound cake like texture. Pour, bake, unmold, slice in half, fill with lemon curd, decorate with leftover frosting and raspberries! Delicious!

Homemade frosting and filling do so much for a cake mix!

The last Pinterest recipe I made this week was lemony shrimp salad with couscous, I ran out of regular couscous and had to sub in the dreaded Israeli couscous. Luckily my twins know not to stick it up their noses now, they have not forgotten the extraction balloon up the nose. For this recipe I cooked the couscous in boiling water for a few minutes until tender and mixed in with the remaining ingredients. It was super fast and delicious. I would definitely make this one again, but I would suggest making it a day ahead of time  or earlier in the day so the flavors have time to absorb. The leftovers were great, so much in fact that I forgot to take a picture of it, we ate it too fast!

Wish me luck this week, I will be watching my nephew all week, as well as my twins and then my sister (who has Downs syndrome and needs constant supervision)  later this week and all weekend! It will be a rambunctious full house here this week! Let us hope I can get some of them to nap! Have a wonderful week!

Weekly Pinterest Wrap Up, only one day late.

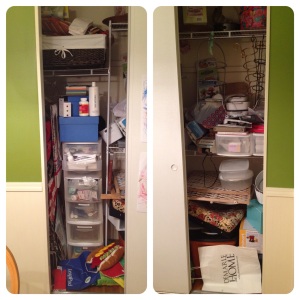
What a busy weekend and it’s only going to get busier this coming week! Last weekend I was finally able to tackle my dining room closet. Do you remember that episode of friends where Chandler breaks into Monica’s storage closet and finds a huge slobby mess? Yes, that’s me. Don’t judge me to harshly.

Ack!

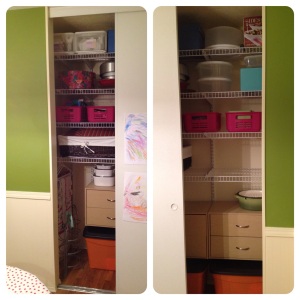
Less than 24 hours later, demoed, spackled, painted and new system up!

Ahh! It’s not even full!

I’m volunteering at our annual church garage sale and I’m using the term garage sale loosely. It’s huge and it takes lots of help to get that thing put together. For me it lets me volunteer a bit for a good cause and it gets me out of the house, which is good for my sanity. Today was my first day and when I came home, I was treated with, “Hey mom, you’ve been gone all day so we’re going to concentrate the whole days emotions in a couple of  hours.” Ugh. The twins are finally in bed and asleep. My husband is on a man date with his brother, something he doesn’t get to do very often. The house is quiet, so enter the click clacking of my laptop keys.

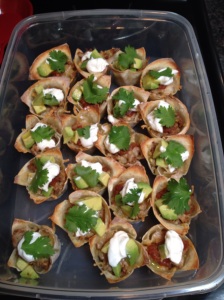
Last week was a busy week for Pinterest inspired recipes. The first was my cauliflower pizza crust, detailed in my last post. Tuesday I took to girls to Mt Tabor park with the ladies and we enjoyed alfresco dining, wine and the Vagabond Opera. Everyone, brought a little something, my friend over at Lula Harp, brought an Israeli couscous salad. I have a history with Israeli couscous. Formally it was a delicious easy meal, then the twins decided it would be a good idea to stick some up there noses. Enter a late night urgent care visit with both girls, oh, and my husband was away on business. I was not pleased, Lula can’t stop laughing about it. I brought some chocolate cake and my pinterest recipe, taco cups. The first time I made the taco cups I misread the directions and made them in full size muffin cups, so they were a little flat. This time I made them in my Demarle mini muffin pan and they turned out wonderful! I topped them with avocado tossed with lime juice, sour cream and cilantro. They were perfect bite sized picnic snacks!

Yum in a cup!

Another Pinterest recipe wasn’t really a specific recipe as much as a lovely looking picture, this one to be exact.

How amazing does this look? (photo by Proud Italian Cook)

I picked up some Walla Walla sweet onions from the farmers market and grilled them then and doctored them up ala Proud Italian Cook with some basalmic, and Gorgonzola. Delicious!

The last recipe I got off Pinterst months ago and have changed it around to suit my needs. Last Wednesday we were greeted by a dreary gray day and I was struck with a yearning for Fall. I know, it’s not even August yet, but I’m so ready for pumpkins, colder weather, apples, cinnamon…

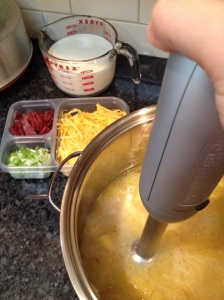
So I was inspired to whip up my Baked Potato soup. It’s so comforting and the whole family just slurps it up!

Top with your favorite baked potato fixings. I like cheddar cheese, green onions and turkey bacon.

Baked Potato Soup

  •  6-8 gold potatoes varied sizes (peeled and cubed)
  • 4 cups chicken stock
  • 1 onion (chopped)
  • 4 cloves of garlic (chopped)
  • 2 cups milk
  • 1 cup half and half
  • salt and pepper to taste
  • 1 stick unsalted butter
  • toppings of your choice

In a large stock pot or dutch oven, melt butter and cook onions and garlic until softened. Add potatoes and chicken stock, cover and simmer until potatoes are soft, about 30 minutes. Using an immersion blender, puree the soup to desired consistency. Pour in the milk and cream and mix to combine. Salt and pepper to taste, you can also add a dash of cayenne pepper if you like some heat! Heat through and serve with toppings of your choice!

An immersion blender makes this so easy. I also like to precook and cut all my toppings ahead of time and serve them in the storage dish for an informal dinner.

Hope you all have a wonderful week!

Dancing in meadows of strawberry jam

Hood strawberries are in season in our area and being sold at every farmers market and pop up stands outside of Costco. What that means to me is JAM! This is my fourth year making and canning jam, so I still consider myself a bit of a novice. That being said, if I can can, you can can. Hee hee, can can.

Making jam is actually pretty easy, the prep, cooking and canning can be a bit time consuming and sweaty. But as long as you’re not doing it in an unconditioned house on a 90+ degree day, you can do it. My husband goes through an alarming amount of jam, like a pint every two weeks. His routine involves taking two peanut butter and jelly sandwiches to work everyday. I’ve tried to entice him to take leftovers or letting me make him something different, but he won’t do it. I say he’s stubborn, he would say he’s consistent. This year I made my tried and true strawberry, strawberry vanilla and natural fruit strawberry (pectin free). The vanilla batch was especially lovely.

Image

A few of my jamming accoutrement.

The thing with canning is unless you’re more than a novice, you really shouldn’t fiddle with the recipes too much. If something scary starts growing in your home canned food, it can make you very sick. I use the Ball canning book where each recipe is tried and tested, making sure there is a proper amount of acid in each recipe to inhibit bacteria growth. Don’t be scared to try, I would recommend checking out a few books from the library.

What you will need:

  • Canning jars (canning is in, you can find jars at most major retailers or online)
  • Canning tools (I bought a canning tool kit for less than $10 at Cost Plus)
  • A big canning pot (again purchased at Cost Plus)
  • A big pot to make the jam in (I caution against doubling a recipe, jam bubbles up, a big pot is needed)
  • a few odds and ends you most likely have, big spoon, slotted spoon, knife, colander etc.
  • A GOOD CANNING BOOK AND RECIPE (I’m not even trying to post a recipe, because I think it is important that you read the basics of canning to get started)

Please don’t be afraid, give it a try! Feel free to ask me any questions and I can try to answer them! I’m hoping to go beyond jam, I’ve tried mango chutney and canning peaches with success, but perhaps I will venture to pickling this year. With the resurgence of home gardens and people trying to save money any way they can, what better way than to make and store your own food!

Image

Oodles of jam!

Now if your like me and you may have some leftover strawberries, what better way to use them then make a strawberry rhubarb pie! What makes this recipe super yummy is the brown sugar and cinnamon that are in the filling make it deliciously syrupy with a hint of spice!

Lattice-Topped Strawberry Rhubarb Pie (from Epicurious)

Crust

For the filling

  • 3 1/2 cups 1/2 ” thick sliced trimmed rhubarb
  • 1 16oz container strawberries, hulled, halved (about 3 1/2 cups)
  • 1/2 cup packed golden brown sugar
  • 1/2 cup sugar
  • 1/4 cup cornstarch
  • 1 t ground cinnamon
  • 1/4 t salt

1 large egg yolk beaten to blend with 1 t water (for glaze)

Make crust according to recipe instructions and chill for 1 hour.

Preheat oven to 400 degrees F. Combine first 7 ingredients in a large bowl. Toss gently to blend. Roll out 1 dough disk on a Demarle RoulPat or a floured work surface. Transfer to your pie dish of choice. Trim dough leaving a 3/4″ overhang. Roll out second dough disk, cut into 14 half inch strips. Or you can eye ball it like me, they were not perfect, but I think it adds a rustic touch! Spoon filling into crust. I like to lay half of my strips on my RoulPat (a Silpat will work as well) then weave in the remaining strips. I then flip my lattice on top of my pie, trim the ends and fold over the edge of the dough and flute the edge. You can also lay the strips on your pie and weave them on there! Do what is comfortable for you!

Brush glaze over the crust, transfer pie to baking sheet and bake 20 minutes. Reduce oven temperature to 350 degrees F. Bake pie until golden and filling thickens (a glass pie plate = 1 hour 25 minutes, Demarle pie mold = 1 hour)

I promise you, you will not be disappointed with this recipe. I have tried several recipes for strawberry rhubarb, but once I tried this one, it has been my go to ever since!

What I enjoyed whilst posting this blog!

Hello world!

I’ve been meaning to start a blog, but to be accurate, I already have a private family blog that I haven’t updated in over a year! I figure if I have a blog that features some of my kitchen adventures and nocturnal craftiness, maybe I will keep up with it more? Let us hope.

A little about myself, I’m a stay at home mom with twin 3 year old girls living in Oregon. I craft when I can, usually in the midnight hours and would like to turn the crafts into more of a profession than a hobby. Getting there slowly but surely, I have an Etsy shop, now I just need to open it! I also work as an independent representative with Demarle at Home. Who is that, you say? Their most reconizable product is their Silpat baking mat, sold in many stores and favored by pastry chefs, at home cooks, and Ms. Martha herself. Demarle has a huge line of flexible bakeware as well as many other wonderful cooking tools that are available only through their at home sales market. I will be using a lot of their products on the blog, trust me, once you try them it’s impossible to go back. Fear not, you can use your own cookware, but if you would like to know more about Demarle, feel free to reach out to me.

So stay tuned for recipes, crafty tutorials, and perhaps a few photos of my kids. They’re just too cute, I can’t always resist.

Who La La