Apple Pies in Jars!

I know, it’s been almost a year since I’ve written anything. I stink, but I’ve made peace with it. To make up for my astounding laziness when it comes to blogging, I will attempt to win you over with my apple pie in a jar recipe!

My dad was kind enough to give me a large box of King apples from the tree back home. We think the tree was planted in the early 1900’s when the first house was built on the property. King apples have turned into a heritage breed, not too commonly found as some other high yielding varieties and I’m not one to turn down free apples!

What to do with over 20 pounds of apples? First was homemade canned applesauce, yummy and delicious! Next came the pies in jars, if you haven’t yet experienced a pie in a jar, prepare to be astounded! Using a wide mouth, straight sided half pint canning jar, you press in pie dough, spoon in the filling of your choice and then top with more pie dough or a crumb topping. Next you put on the lid and ring and put it in the freezer. Then in the dead of winter when you need something brighten your dreary day, you pop a pie jar in the oven straight from the freezer. Less than an hour later, your house smells awesome and you’re eating a delicious single serving pie that tastes like it was made fresh! My personal favorite is Strawberry Rhubarb or Apple. I would recommend using hearty fruit pies for freezing, avoiding things like pumpkin etc.

This recipe is for ten crumb topped apple pies with enough filling and crumb topping leftover for a large apple crisp! I apologize for the lack of photos in this post. I wasn’t anticipating  a blog post, but people have asked for the recipe/instructions.


IMG_5830

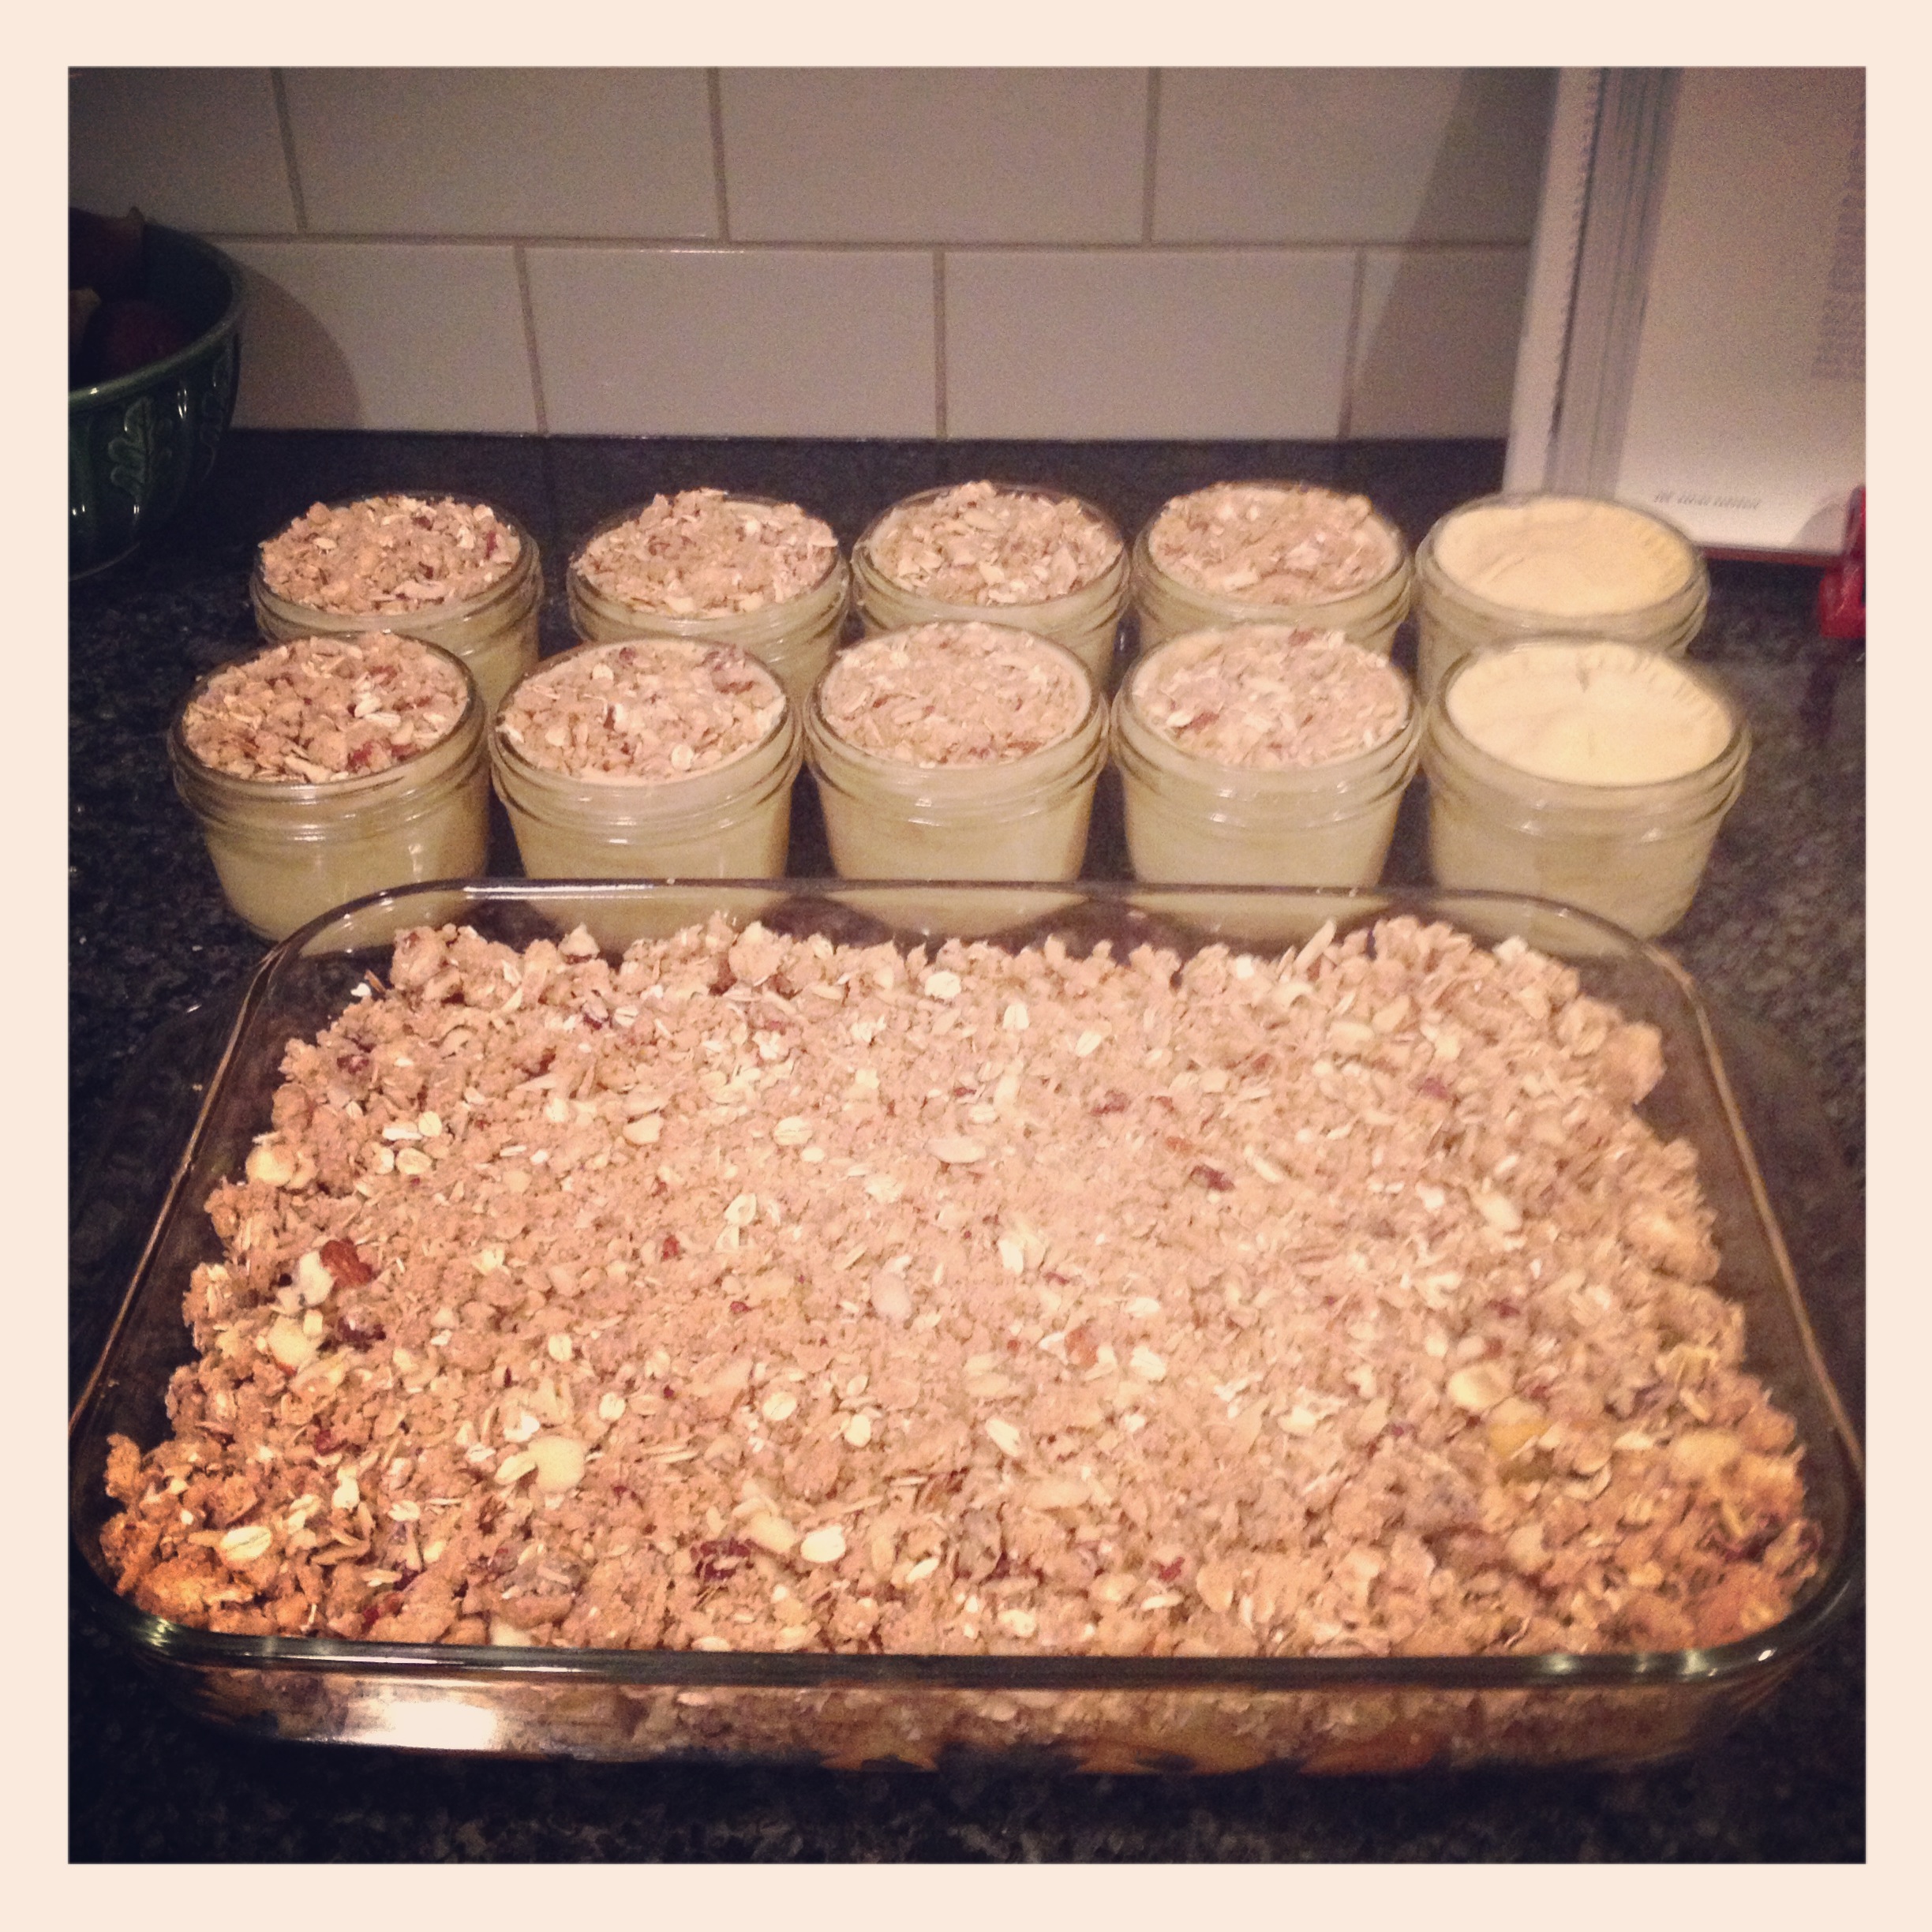
Finished pies and a huge apple crisp!

Apple Pies in Jars and Apple Crisp (if you do not want to make an apple crisp, half the filling AND crumb topping recipe)

Dough (Pate Brisee from Martha Stewart)

  • 2 1/2 cups of all-purpose flour
  • 1 t of salt
  • 2 sticks (1 cup) unsalted butter, cold, cut into small pieces
  • 1/4 – 1/2 cup ice water

In the bowl of a food processor, combine flour and salt; pulse to combine. Add butter and mix until it resembles a course crumb with some large pieces of butter remaining. You can mix by hand by cutting butter into flour with a pastry cutter.

With machine running add ice water through feed tub, slowly. Usually a 1/4 cup will do but you may need a bit more. Blend just until the dough holds together without being wet or sticky. Turn dough out on a clean counter/work surface. Divide in half and wrap each in plastic wrap, flattened into a disk. Refrigerate for at least 1 hour or overnight.


Filling

  • 6 pounds of apples, peeled, cored and cut into thin quarter-inch slices. I like to use my apple peeler/corer/slicer. You will need to very coarsely chop the slices as they are going in small jars.
  • 5 T fresh lemon juice (reduce to 4 T if you’re using tart apples)
  • 1/2 cup granulated sugar
  • 2 t ground cinnamon
  • 1/2 t freshly grated nutmeg
  • 1/4 t salt

Mix lemon juice, sugar, salt and spices together in a large bowl. Prepare you apples, tossing them frequently in the bowl to prevent browning.


Crumb Topping

  • 1 1/4 cups unbleached all-purpose flour
  • 1 cup old-fashioned oats
  • 2/3 cup packed golden brown sugar
  • 1 t salt
  • 2 sticks of chilled, unsalted butter, diced
  • 3/4 cup pecans, coarsely chopped
  • 3/4 cup sliced almonds
  • 1 t cinnamon
  • 1/2 t freshly grated nutmeg


To Assemble Pies

  1. Roll out chilled dough, one at a time so they stay cold. Cut out a round for the bottom of the jar using a round cookie cutter. The ring lid works great for this, it will come up the sides a little bit, but will help with sealing the seam. Try to limit your flour usage as the dough will not stick to the side of the jar if too much flour is applied. After you cut your round, place it in the bottom of the jar.
  2. Cut out a wide strip dough (roughly 2 1/4″ wide and 10″ long) for the sides of the jar using a small knife or a pie wheel. Stand dough up in the jar and press together the side seam and the bottom seam. As your dough warms up and gets saturated with flour, you may find it easier to press the dough in by hand. You may have some overhang of dough on the top of the jar. Trim with a small knife.
  3. Gently put filling in jars, layering apples in with your fingers to prevent large spaces that would bake down. Don’t be afraid to press the apples down. Leave at least 1/4″ space at the top.
  4. Top with crumb topping, making sure it is flat and level at the top. You may have enough dough leftover to use as a top crust on a couple of jars. Make sure to cut slits for vents and press around the edge with a fork.
  5. Place lids and rings on top tightly and freeze.
  6. Use your leftover filling and crumb topping as an apple crisp in a 9 x 13 pan. Bake at 350 for 30-45 minutes.
  7. TO BAKE PIES FROM FROZEN, place on Silpat (helps if it bubbles over) bake at 400 degrees for 20 minutes then reduce heat to 350 degrees for 30 minutes. Then enjoy your delicious pie that will keep in the freezer for a few months but tastes like you just made it! I have tried baking these pies fresh and found the dough rose out of the jars quite a bit while baking. They tend to bake more neatly from frozen.
IMG_3926

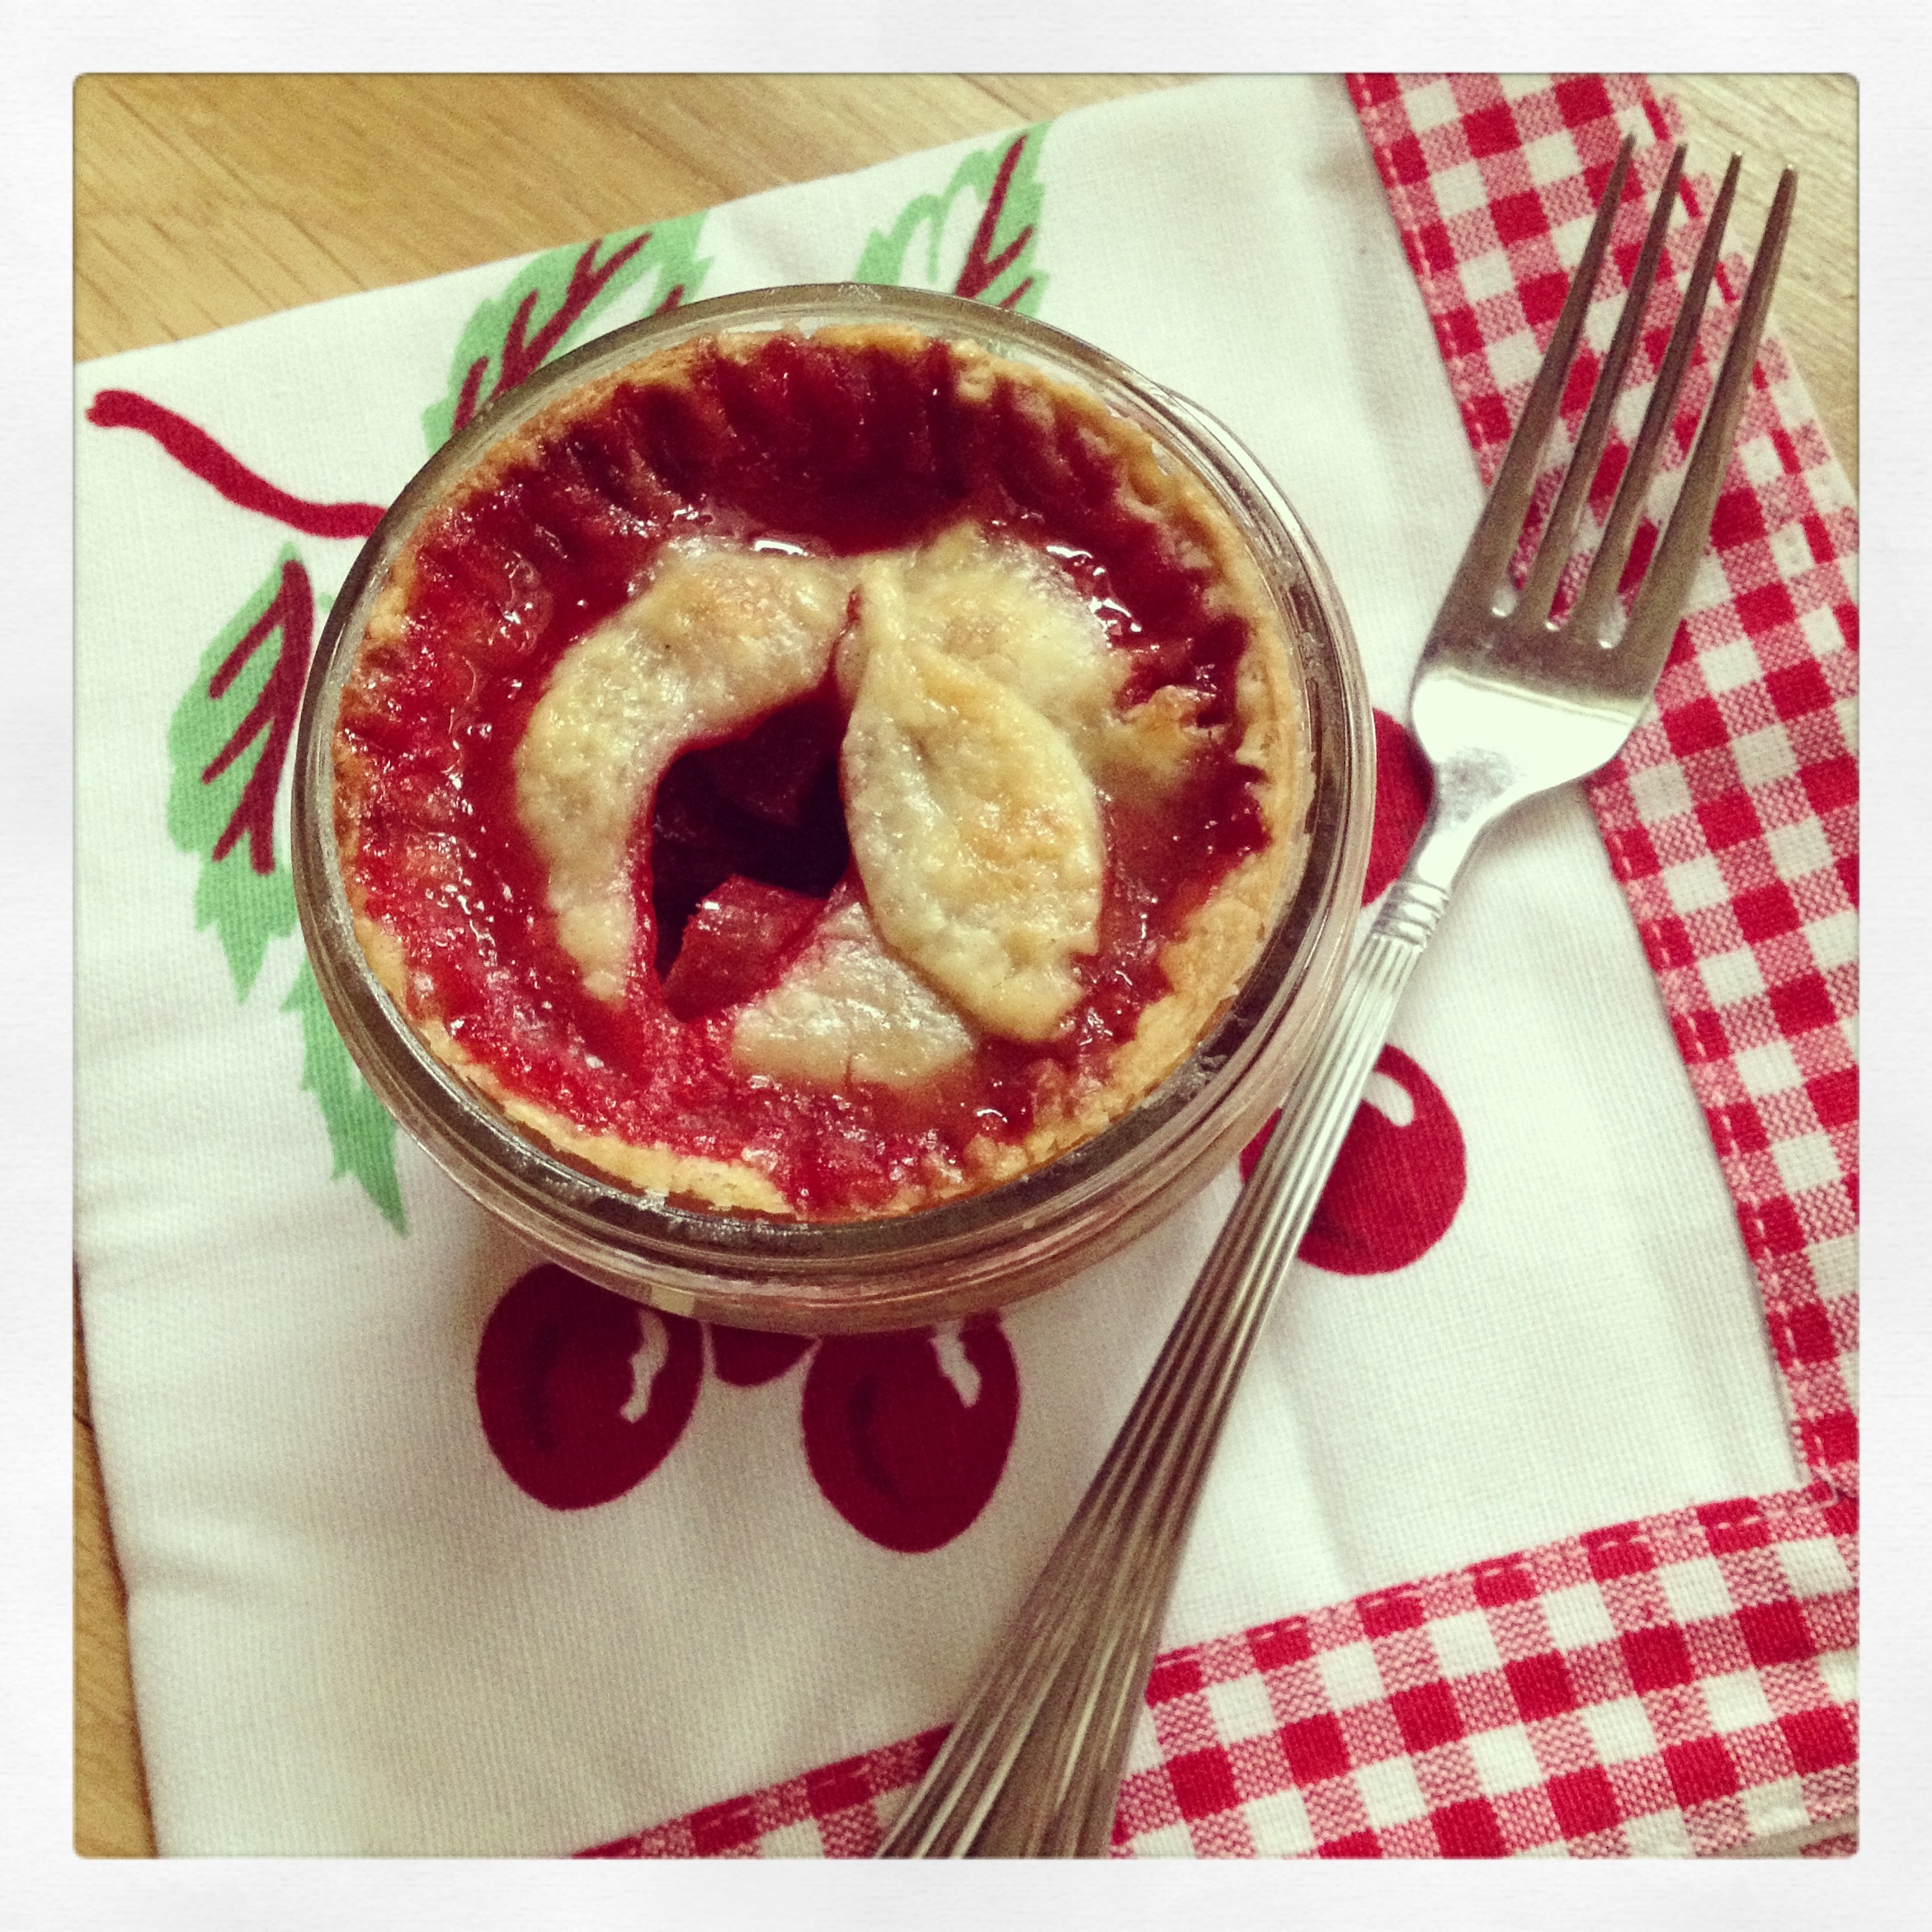
Strawberry Rhubarb Pie in the dead of winter!

I hope you enjoy your pies in jars. Remember you can use any filling! Be creative. If you opt out of a crumb topping and decide to top with pie dough, you will yield 4-6 pies instead. Let me know how they turn out!

Who La La


Pie pops!

What another pie post? I know what you’re thinking, this lady is obsessed with pie. I do love pie, but I’m really just trying to use up all the strawberries I have taking up valuable fridge space! Since I had a few leftover after the jam  and the strawberry rhubarb pie. I thought I would whip up another batch and make some pies in jars to freeze. Nothing is more lovely than pulling a summer pie out of the freezer during those blustery fall days and baking it. Delicious smells and warm pie to cheer you up. I should have perhaps looked at my supplies before I started on this project, after I had already made my dough, I realized I only had 4 straight sided half pint canning jars with lids. Whoops, what to do with the extra filling and dough? How about pie pops? Have you seen them around?

As of late, there has been a large surge with anything associated with a pop. Cake pops, gourmet popsicles, marshmallow pops and now, pie pops. I think anything that comes on a stick is automatically infused with whimsy and charm, perhaps that is their allure. Don’t forget the portability and kid appeal, a huge plus to any mom or “big” kid on the go.

The finished “pretty” pic.

They’re so easy to make and only need a few modifications from a standard pie. One double crust pie with filling should make about 50 pie pops. In my case, it made 4 pies in jars, 2 crisps and 7 pie pops. I realized I only had 7 lollipop sticks, again to my point of checking your supplies before you begin a project!

Pies in jars, can either go straight in the oven or into the freezer!

For pie pops, you just need lollipop sticks and a 2 5/8″ dough cutter (I used my Demarle dough cutters) or like size. I like a fluted edge, but a round or even a heart would be so cute! I used the pate brisee dough from Martha Stewart, linked in my last post. An all butter crust has a little bit more workability and will hold together a little better when you bite into it. For a filling, anything will do, but I suggest you cut your ingredients a little smaller that you normally would. When you’re putting in only a tablespoon of filling, a half inch chunk of rhubarb can take up a lot of space! Just roll out your dough, cut out your circle and lay on your Silpat or a cookie sheet with parchment. Brush an egg wash on the circle then place a lollipop stick 1/2″ from the upper edge. Spoon a tablespoon of filling in the center of your circle and place your crust on top. I used a fork to press around the edge of each pop, cut about of vents, brushed with egg wash and baked at 375 degrees F for 15 to 20 minutes.  Ta dah, instant yummy on stick!

All baked and ready to eat!

I think the twins liked them!

Dancing in meadows of strawberry jam

Hood strawberries are in season in our area and being sold at every farmers market and pop up stands outside of Costco. What that means to me is JAM! This is my fourth year making and canning jam, so I still consider myself a bit of a novice. That being said, if I can can, you can can. Hee hee, can can.

Making jam is actually pretty easy, the prep, cooking and canning can be a bit time consuming and sweaty. But as long as you’re not doing it in an unconditioned house on a 90+ degree day, you can do it. My husband goes through an alarming amount of jam, like a pint every two weeks. His routine involves taking two peanut butter and jelly sandwiches to work everyday. I’ve tried to entice him to take leftovers or letting me make him something different, but he won’t do it. I say he’s stubborn, he would say he’s consistent. This year I made my tried and true strawberry, strawberry vanilla and natural fruit strawberry (pectin free). The vanilla batch was especially lovely.

Image

A few of my jamming accoutrement.

The thing with canning is unless you’re more than a novice, you really shouldn’t fiddle with the recipes too much. If something scary starts growing in your home canned food, it can make you very sick. I use the Ball canning book where each recipe is tried and tested, making sure there is a proper amount of acid in each recipe to inhibit bacteria growth. Don’t be scared to try, I would recommend checking out a few books from the library.

What you will need:

  • Canning jars (canning is in, you can find jars at most major retailers or online)
  • Canning tools (I bought a canning tool kit for less than $10 at Cost Plus)
  • A big canning pot (again purchased at Cost Plus)
  • A big pot to make the jam in (I caution against doubling a recipe, jam bubbles up, a big pot is needed)
  • a few odds and ends you most likely have, big spoon, slotted spoon, knife, colander etc.
  • A GOOD CANNING BOOK AND RECIPE (I’m not even trying to post a recipe, because I think it is important that you read the basics of canning to get started)

Please don’t be afraid, give it a try! Feel free to ask me any questions and I can try to answer them! I’m hoping to go beyond jam, I’ve tried mango chutney and canning peaches with success, but perhaps I will venture to pickling this year. With the resurgence of home gardens and people trying to save money any way they can, what better way than to make and store your own food!

Image

Oodles of jam!

Now if your like me and you may have some leftover strawberries, what better way to use them then make a strawberry rhubarb pie! What makes this recipe super yummy is the brown sugar and cinnamon that are in the filling make it deliciously syrupy with a hint of spice!

Lattice-Topped Strawberry Rhubarb Pie (from Epicurious)

Crust

For the filling

  • 3 1/2 cups 1/2 ” thick sliced trimmed rhubarb
  • 1 16oz container strawberries, hulled, halved (about 3 1/2 cups)
  • 1/2 cup packed golden brown sugar
  • 1/2 cup sugar
  • 1/4 cup cornstarch
  • 1 t ground cinnamon
  • 1/4 t salt

1 large egg yolk beaten to blend with 1 t water (for glaze)

Make crust according to recipe instructions and chill for 1 hour.

Preheat oven to 400 degrees F. Combine first 7 ingredients in a large bowl. Toss gently to blend. Roll out 1 dough disk on a Demarle RoulPat or a floured work surface. Transfer to your pie dish of choice. Trim dough leaving a 3/4″ overhang. Roll out second dough disk, cut into 14 half inch strips. Or you can eye ball it like me, they were not perfect, but I think it adds a rustic touch! Spoon filling into crust. I like to lay half of my strips on my RoulPat (a Silpat will work as well) then weave in the remaining strips. I then flip my lattice on top of my pie, trim the ends and fold over the edge of the dough and flute the edge. You can also lay the strips on your pie and weave them on there! Do what is comfortable for you!

Brush glaze over the crust, transfer pie to baking sheet and bake 20 minutes. Reduce oven temperature to 350 degrees F. Bake pie until golden and filling thickens (a glass pie plate = 1 hour 25 minutes, Demarle pie mold = 1 hour)

I promise you, you will not be disappointed with this recipe. I have tried several recipes for strawberry rhubarb, but once I tried this one, it has been my go to ever since!

What I enjoyed whilst posting this blog!