Sewvivor – Who La La Hoots (Who La La Crafts)

I know, I can’t believe it, I’m blogging. Say what?! What can I say, life is busy and it is easy to push things aside. So what could possibly be so intriguing to make me stay up till almost midnight describing something I recently quilted? That’s right, it’s Sewvivor and I thought this year I would throw my name in for consideration!

Since I tend to only blog once a year, I will give a brief summary of what has been happening since October of 2013. My twins turned 5, one lost two teeth this last week and I have been sewing…a lot! I’ve always been interested in quilting and dabbled in it periodically over the years, but as of the last year I have been honing my skills and challenging myself to try new things. My most recent experimentation into the crafty unknown was a swap mini quilt I recently did for the Schnitzel and Boo Mini Quilt Swap (Round 2).

Finsihed Mini

My initial quilt design had to have foxes because of my partners Instagram name. I used Elizabeth Hartman’s adorable Fancy Fox pattern. I love it.

Fancy FoxFancy Fox Three


Then I have liked the Economy block ever since there was an economy block along on Instagram a few months ago. I followed Rita of Red Pepper Quilts tutorial.

Fox and Economy Blocks

The last piece in the puzzle was teeny tiny paper piecing. My partner really liked tiny piecing and I recently came across some rubber stamp paper piecing templates at Goodwill. Thrifted and crafty? Yes please! I’m very much a novice at paper piecing, but have been looking at different tutorials on YouTube to help boost my confidence.

Thrifted stamps

Teeny paper piecing

The last two blocks were a partial dresden and a block I pulled from Patchwork Please by Ayumi Takahashi. A wonderful Zakka project book that oozes cuteness.

Finished top

One final detail took advantage of some English paper piecing and basic applique.

EPP and Applique detail

Overall the mini isn’t perfect, but it stretched me past my comfort zone and made me a little bummed that I didn’t make one for myself! My partner loved it and even blogged about it. I was blushing all day!


Apple Pies in Jars!

I know, it’s been almost a year since I’ve written anything. I stink, but I’ve made peace with it. To make up for my astounding laziness when it comes to blogging, I will attempt to win you over with my apple pie in a jar recipe!

My dad was kind enough to give me a large box of King apples from the tree back home. We think the tree was planted in the early 1900’s when the first house was built on the property. King apples have turned into a heritage breed, not too commonly found as some other high yielding varieties and I’m not one to turn down free apples!

What to do with over 20 pounds of apples? First was homemade canned applesauce, yummy and delicious! Next came the pies in jars, if you haven’t yet experienced a pie in a jar, prepare to be astounded! Using a wide mouth, straight sided half pint canning jar, you press in pie dough, spoon in the filling of your choice and then top with more pie dough or a crumb topping. Next you put on the lid and ring and put it in the freezer. Then in the dead of winter when you need something brighten your dreary day, you pop a pie jar in the oven straight from the freezer. Less than an hour later, your house smells awesome and you’re eating a delicious single serving pie that tastes like it was made fresh! My personal favorite is Strawberry Rhubarb or Apple. I would recommend using hearty fruit pies for freezing, avoiding things like pumpkin etc.

This recipe is for ten crumb topped apple pies with enough filling and crumb topping leftover for a large apple crisp! I apologize for the lack of photos in this post. I wasn’t anticipating  a blog post, but people have asked for the recipe/instructions.


IMG_5830

Finished pies and a huge apple crisp!

Apple Pies in Jars and Apple Crisp (if you do not want to make an apple crisp, half the filling AND crumb topping recipe)

Dough (Pate Brisee from Martha Stewart)

  • 2 1/2 cups of all-purpose flour
  • 1 t of salt
  • 2 sticks (1 cup) unsalted butter, cold, cut into small pieces
  • 1/4 – 1/2 cup ice water

In the bowl of a food processor, combine flour and salt; pulse to combine. Add butter and mix until it resembles a course crumb with some large pieces of butter remaining. You can mix by hand by cutting butter into flour with a pastry cutter.

With machine running add ice water through feed tub, slowly. Usually a 1/4 cup will do but you may need a bit more. Blend just until the dough holds together without being wet or sticky. Turn dough out on a clean counter/work surface. Divide in half and wrap each in plastic wrap, flattened into a disk. Refrigerate for at least 1 hour or overnight.


Filling

  • 6 pounds of apples, peeled, cored and cut into thin quarter-inch slices. I like to use my apple peeler/corer/slicer. You will need to very coarsely chop the slices as they are going in small jars.
  • 5 T fresh lemon juice (reduce to 4 T if you’re using tart apples)
  • 1/2 cup granulated sugar
  • 2 t ground cinnamon
  • 1/2 t freshly grated nutmeg
  • 1/4 t salt

Mix lemon juice, sugar, salt and spices together in a large bowl. Prepare you apples, tossing them frequently in the bowl to prevent browning.


Crumb Topping

  • 1 1/4 cups unbleached all-purpose flour
  • 1 cup old-fashioned oats
  • 2/3 cup packed golden brown sugar
  • 1 t salt
  • 2 sticks of chilled, unsalted butter, diced
  • 3/4 cup pecans, coarsely chopped
  • 3/4 cup sliced almonds
  • 1 t cinnamon
  • 1/2 t freshly grated nutmeg


To Assemble Pies

  1. Roll out chilled dough, one at a time so they stay cold. Cut out a round for the bottom of the jar using a round cookie cutter. The ring lid works great for this, it will come up the sides a little bit, but will help with sealing the seam. Try to limit your flour usage as the dough will not stick to the side of the jar if too much flour is applied. After you cut your round, place it in the bottom of the jar.
  2. Cut out a wide strip dough (roughly 2 1/4″ wide and 10″ long) for the sides of the jar using a small knife or a pie wheel. Stand dough up in the jar and press together the side seam and the bottom seam. As your dough warms up and gets saturated with flour, you may find it easier to press the dough in by hand. You may have some overhang of dough on the top of the jar. Trim with a small knife.
  3. Gently put filling in jars, layering apples in with your fingers to prevent large spaces that would bake down. Don’t be afraid to press the apples down. Leave at least 1/4″ space at the top.
  4. Top with crumb topping, making sure it is flat and level at the top. You may have enough dough leftover to use as a top crust on a couple of jars. Make sure to cut slits for vents and press around the edge with a fork.
  5. Place lids and rings on top tightly and freeze.
  6. Use your leftover filling and crumb topping as an apple crisp in a 9 x 13 pan. Bake at 350 for 30-45 minutes.
  7. TO BAKE PIES FROM FROZEN, place on Silpat (helps if it bubbles over) bake at 400 degrees for 20 minutes then reduce heat to 350 degrees for 30 minutes. Then enjoy your delicious pie that will keep in the freezer for a few months but tastes like you just made it! I have tried baking these pies fresh and found the dough rose out of the jars quite a bit while baking. They tend to bake more neatly from frozen.
IMG_3926

Strawberry Rhubarb Pie in the dead of winter!

I hope you enjoy your pies in jars. Remember you can use any filling! Be creative. If you opt out of a crumb topping and decide to top with pie dough, you will yield 4-6 pies instead. Let me know how they turn out!

Who La La


I’m still here!

Tonight of all nights I choose to blog, but since I’ve been uncharacteristically glued to the television for the last couple of hours and taking a break from sewing, what else could I do but dust my laptop and fire her up! It’s interesting watching the results, President Obama’s camp waving flags and smiling, long sedate faces at the Romney camp. Whatever side your on, winning or losing, left or right, the thing to take away is that the country is split in two when it comes to political views and we aren’t going to get anywhere unless we work together. We don’t have to convince each other that your wrong and I’m right. My best friend who has starkly different views than me,  mentioned that we could listen to each other and learn where the other is coming from. You hear that Washington?  Just a little?

I know I’ve have been more than slacking lately, well at least when it comes to blogging. I have to say, when the twins started preschool I thought I would have more time on my hands. Ummm…yeah.  Meetings, auction, committees, conferences and volunteering, oh my! Add this to the list of things people never tell you until after you have kids, like how your bladder will never be the same, etc. When my daily to do list goes up on the chalk board everyday, blogging gets pushed down to the bottom. Plus it is also holiday craft fair season, which keeps me sewing up into the wee hours of the morning for days on end. I had my first bazaar last Saturday and it went pretty well, definitely excited to do some more and to get over my nervousness and start my Etsy shop. Two things keep me from jumping in. I’m not sure what to put in my shop policies regarding returns and complaints, it just makes me nervous. Then shipping, what do you charge for shipping? Do you charge a flat fee and just eat it if you under charge? I know these seem inconsequential and I will get over them soon, because I need to start selling some stuff or my husband is going to blow a gasket if one more craft store bag comes into this house! Here’s a little taste of what I’ve been working on and some pictures of my booth!

I managed the Weekender bag!

A cute lunch bag, I can’t wait to make more!

Needle books!

Even bakers get the blues.

PIes in jars for a bake sale, one guy bought a whole case!

Coffee cozies, my husband thinks these are nuts, I sold a bunch. Ah ha ha!

Bunting made with vintage linens.

My booth!

A few of my wares!

You can see a little of my Sugar Plum garland.

My kid’s reward for letting me sew so much.

Doing craft fairs is certainly a lot of work, but when my husband texts me and tells me that one of the girls says, ” Where’s the owl paper? I need it for my craft fair!” Classic!

Hopefully it won’t be so long next time, if it’s been awhile come looking for me, I may be trapped under my ironing board or stuck in a school meeting!

Chicken Pot Hand Pies and some other stuff.

I know I’ve been a little absent the past couple of weeks. We took a family vacation down to San Diego, a trip that included a lot of firsts for the girls. First plane ride, Sea World, first wedding, just to name a few! We ran the girls around and exhausted them, but we had a lot of fun! We were flying down to see my college roommate get married, I love the fact that while we don’t talk everyday and haven’t seen each other in 10 years (!!!) we can still get together and have a wonderful time. I’m touched that she thought of us and included us in her beautiful wedding to a wonderful guy. On a side note, when we were roommates in college, we regularly played tricks on each other. I recall one time she put a used toothbrush that SHE FOUND in my backpack. Imagine my horror on finding that in the middle of class when I was innocently reaching for a highlighter. My senior year, while my parents were visiting to watch my dance ensemble performance, my mom gave me some flowers in a rather hideous vase. I’m sorry, Mom, it was so sweet of you to give me flowers in a point shoe shaped vase! This vase became an inside joke between L and I and we ended up hiding it in each others stuff, houses or care packages to each other. I shipped it to her years ago and assumed it was long gone until I found it in my suitcase. Damn it! I know she had help from my husband, I feel so betrayed. Yet I feel so loved that L kept that ugly vase for all these years and moves. It must say something about our relationship or perhaps it speaks more to the lengths we will go to, to get back at one another.

M posing with the vase. If any of you have any dastardly ways I can get this back to her besides in a package please tell me!

Here’s a few of my favorite shots from the trip.

First airplane ride!

Sea World

Wiped!

My view for breakfast the night after the wedding. Amazing!

Of course after you return home from your vacation, you then naturally feel like you need to go on vacation again as you’re stuck washing clothes, unpacking, trying to get back on schedule and a bevy of other things. Not to mention we only had one day to recover before we sent the girls to school! Yes, school, minus commuting time, that is 3 hours all to myself! Squee! Not like I have a problem filling the time, it goes by in an instant! Now I’m subjecting you to shots of the twins on there first day. Bear with me, proud mommy moment!

First Day!

I actually managed to get a few Pinterest recipes done this last week even though we were in California for part of it. So here is an abbreviated version of my weekly pinterest round up. Fall is upon us, so I’ve been craving soups, stews, slow cooked meals and crusty freshly baked bread. Even though the day was warm, I decided to try this slow cooker Sausage, Bean and Pasta stew that I pinned. This link will take you to the pin.  The prep for this stew was super fast and required no precooking, a pet peeve of mine when it comes to slow cooking anything! The only thing I didn’t like about the stew is that is sucked a lot of the flavor out of the sausages, leaving them a little bland. Still I would make it again, it tasted even better the next day.

Yum, fall soup and bread and it’s only 91 degrees outside.

To go with the soup I wanted to make a loaf of bread and I’ve been dying to make some bread in my dutch oven after I saw a person I follow on instagram post pictures of her amazing results.

My instagram version

I pinned the website she used for the recipe and have been waiting for it to cool down a bit. I was also  little intimidated by the recipe because it rises at room temperature for over half a day, which requires a lot of pre-planning on my part. I ended up mixing the dough at 10pm the night before I needed it and baked the next day at 11am and literally pulled the thing out of the oven, threw it on a cooling rack and raced out the door to pick up the girls. Simply So Good blog has several variations on a wonderful recipe. I went with the cranberry, almond and orange route, but substituted in dried cherries which I’ve been really into lately! Here’s my photo progression of a very successful pin!

Only a few ingredients!

Before

After

Mine wasn’t very round because I just plopped it in the pot, but I was going for rustic!

Look it worked!

The bread really was so delicious. The blogger has some wonderful looking variations with add ins like gruyere cheese, lemon zest and rosemary. That savory version would have gone better with the soup, but the husband wanted the other one.

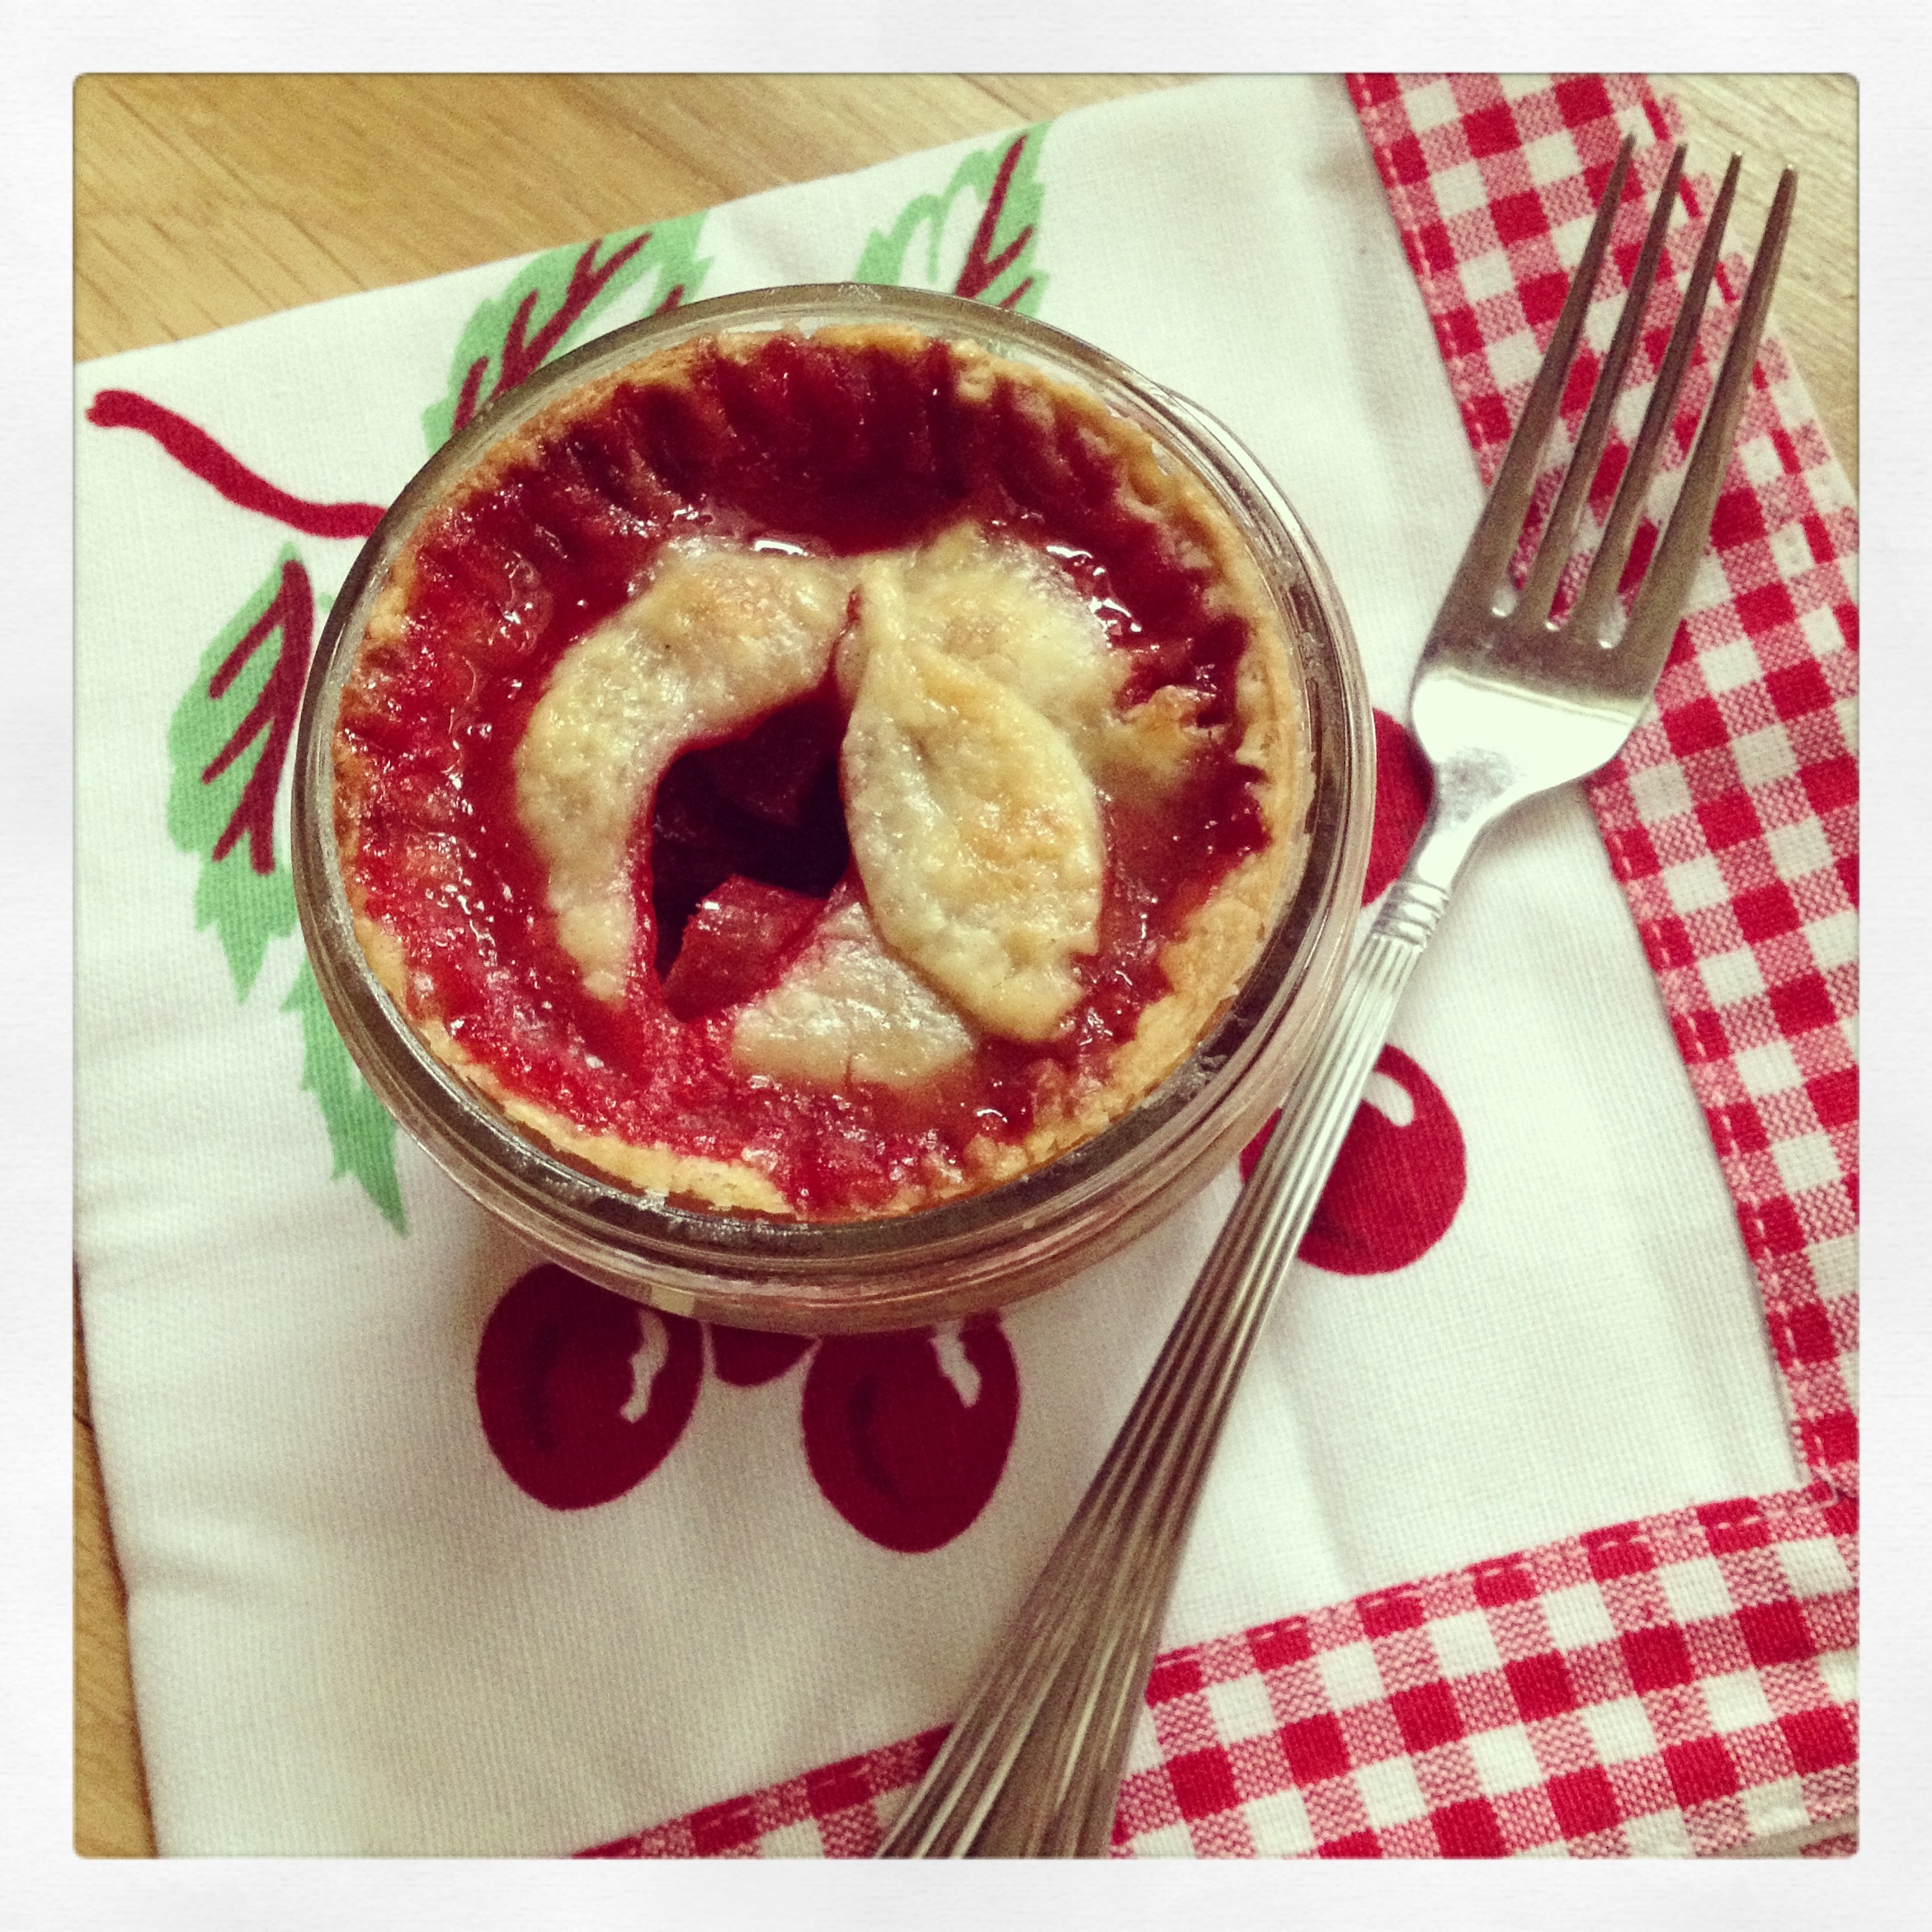
Now finally on to my Chicken Pot Hand Pies. This recipe can really be used to make a standard chicken pot pie, free form hand pies, muffin pan pot pies or whatever else you can dream of. The way I made them today I ended up with some extra filling, which you can use to make more chicken pot pie, freeze for later or perhaps use as a filling for the biscuit muffins I did a few weeks ago. I made a recipe of Martha Stewart’s Pate Brisee recipe, which makes enough dough for two crusts. If you’re making hand pies you may want to make a 1 1/2 times recipe. Feel free to use store bought dough as well!

Comfort food on the go.

Chicken Pot Pie (Hand Pies and beyond)

Crust

Pate Brisee recipe via Martha Stewart (you can double this if you want to use all your filling if making hand pies)

  • 2 1/2 cups all-purpose flour
  • 1 teaspoon salt
  • 1 teaspoon sugar
  • 1 cup (2 sticks) unsalted butter chilled and cut into small pieces
  • 1/4 to 1/2 cup ice water
  1. In the bowl of a food processor, combine flour, salt, and sugar. Add butter, and process until the mixture resembles coarse meal, 8 to 10 seconds.
  2. With machine running, add ice water in a slow, steady stream through feed tube. Pulse until dough holds together without being wet or sticky; be careful not to process more than 30 seconds. To test, squeeze a small amount together: If it is crumbly, add more ice water, 1 tablespoon at a time.
  3. Divide dough into two equal balls. Flatten each ball into a disc and wrap in plastic. Transfer to the refrigerator and chill at least 1 hour. Dough may be stored, frozen, up to 1 month.

Filling

  • 1 stick of butter
  • 1 onion chopped
  • 2 medium potatoes, peeled and cubed (I used 4 small)
  • 2 carrots, peeled and rough chop
  • 1 cup frozen peas
  • 2 cups of chicken broth
  • 1 boullion cube or like item (I like Better than Boullion)
  • 3-4 cups pre-cooked chicken (I use the breasts from a rotisserie chicken)
  • 1/3 cup flour
  • 2 T heavy cream
  • salt and pepper

Put broth in a sauce pan, add boullion and heat to a simmer. Add chopped potatoes and cook until almost tender but still slightly undercooked, 10-15 minutes. In the meantime, melt butter in a large pan over medium heat. Add chopped onions and cook until translucent but not brown, 10-15 minutes. Add flour to onions and butter, stirring constantly, cook for 1-2 minutes, until the raw flour odor goes away. Pour in the broth/potatoes into onion mixture. Cook until mixture thickens and starts to bubble. Season with 1 t of salt and a dash of pepper. Add in 2 T of heavy cream (it adds a wonderful richness, you know in addition to that stick of butter.) Add in carrots, chicken and peas. This makes a chunky filling, you can add more broth if you want. Feel free to throw in your favorite vegetables. Sometimes we throw in edamame or whatever else we have on hand.

1. Onions in butter 2.Broth and potatoes 3.Broth mixed in with onion mixture
4. Finished filling

Take filling off heat and let cool. This is a pretty important step. If you put the hot filling on your pie dough (you know like I did) your dough can become misshapen and tear. If I was more on top of it, I would have pre-made my filling earlier as well as my crust. That way working with colder components, the crust would have baked up a little better.

Preheat you oven to 425 degrees and quickly roll out your dough. You can either make a single large pot pie, free form hand pies (rolling, cutting the dough into rectangles add filling and fold over before sealing) or try one of those handy kitchen gadgets that crap up our kitchens, but actually worked surprisingly well!

1. Cutting pie dough with unnecessary but totally awesome hand pie accoutrement 2. Forming pie
3. Post pressed pie 4.Ready to bake

Lay on your Silpat or cookie sheet lined with parchment, brush the pie with cream or a beaten egg and bake for 15-20 minutes for hand pies or 30 minutes for a single pie.

Voila! You will notice the star shape that was on my pie mold, completely baked out of the pie. My dough and filling were way to warm.

Have a great week!

Why so quiet?

That was a text I got from my gal pal the other day. She was probably wondering why I wasn’t pestering her with a deluge of snarky texts. We do love our banter! The answer is I was struck with a horrible case of Eustachian tube dysfunction caused by seasonal allergies. The whole thing was beyond weird, I had no symptoms of my allergies except for an earache which promptly turned into intense throbbing and a trip to urgent care. A pile of allergy medication and pain pills later, I had to endure 4 days of horrible pain and stabbing ear popping once the medication finally started to work. I was not a fine companion, I will admit. It wasn’t as bad as labor, I had twins without pain medication, but at least with labor you’re working towards something. In the end you will have cute, crying, slimy babies to hug. With a throbbing ear, not so much. Luckily, the ear is on the mend and the pain has finally gone away. I was skeptical believing my doctors that it would go away with our antibiotics, but of course they were right as they calmed me over the phone when I was worried when my ear was leaking.

Mmm, pile of medication.

So the crazy ear thing is my excuse for not getting too much done over the past ten days. I did get a few minor things done. I read the entire Little House on the Prairie books, it’s been a long time! I made some coffee cake muffins the other day using Ina Garten’s sour cream coffee cake recipe, I replaced the sour cream with some fat free plain greek yogurt and they turned out delicious. I don’t have pictorial proof of said muffins, however, because I over filled the muffin cups and they looked…well…not so good. Lesson learned, don’t over fill muffin cups. They served their purpose though by making the house smell nice and yummy when the assessor came. No funky house here!

The girl’s and I also went to Oaks Park for preschool day, we met their cousins and had a nice time going on some rides.

See aren’t they cute?

The girls are also getting ready to go to school (insert angels singing OOOOOOOOooooo) which will leave me with some unaccustomed free time. I’m hoping to fill it with going to the gym, sewing and generally getting my s*&% done without constant interruption. I decided to make little bags for school. I used a wonderful free pattern for a poochie bag by the Happy Zombie, you can find it here. It’s a great little bag that only takes 3 fat quarters to make! I used a coated cotton for the liner, so the girls can use it for a wet bag if they have any accidents at school. I also used flannel, which looked cute, but made for a bulky bag. Next time I would opt for something a little thinner.

One done and one in progress!

Done and packed!

I got my machine back from the shop, they could find nothing wrong with it and when they tried it the seams looked straight. What the heck? I jumped right into this project and it was working fine for me. My next project is the Amy Butler Weekender bag I mentioned a couple of posts ago. Except when I was working on the piping last night, what came back but that wonky stitching. Gah! I am currently waiting for my sister in law to deliver my mom’s extra machine, yeah! Hopefully it will see me through the holiday sewing season and perhaps I can save up enough to get an upgrade.

In my last post I promised a chili recipe that finally satisfied my husbands picky palette. I’ve fiddled with it a little bit and think it’s a winner. It’s made with ground turkey which lightens it up a bit and has a lovely rich quality from cocoa powder and molasses.

Turkey and Bean Chili adapted from Everyday Food makes 8 servings

  • 4 strips bacon cut into 1/2 inch pieces
  • 2 pounds ground turkey (7% fat)
  • 3 large onions, chopped
  • 1/2 cup minced garlic cloves
  • 1 medium fresh jalapeno, seeded and minced. Use two if you like it spicy
  • 3 T chili powder
  • 3 T cocoa powder, unsweetenend
  • 4 t ground cumin
  • 2 cans whole tomatoes in puree (28 oz each)
  • 2 T unsulfered molasses
  • coarse salt
  • 3 cans pinto beans, rinsed and drained
  • 1 can of black beans, rinsed and drained
  • toppings of your choice; cheddar cheese, sour cream, chips, crumbled cornbread, cilantro etc.

Use a big pot, 5 quarts! Heat over medium heat, add bacon and cook until crisp and brown. Raise heat to high and add turkey, cook, breaking up the meat, until now longer pink.

Add onion, garlic and jalapenos; cook until soft, stirring often. Stir in chili powder, cocoa powder and cumin. Cook, stirring until fragrant.

Break up tomatoes with your hand and stir them in, along with the puree. Be careful here, I sprayed tomato all over myself! Add molasses, 1 cup of water and 4 teaspoons of salt; bring to a boil. Reduce heat to a simmer; cook, partially covered 30 minutes.

Add beans and continue to cook until meat and beans are tender and chili has thickened. About 30 minutes. Serve with toppings of your choice. This is a yummy one and it tastes even better as leftovers! Enjoy!

The sewing machine is here, let’s hope it works! Hopefully my next post will have a picture of my new weekender bag!

Bon Appetit!

Julia and Paul Child

Did you just say that in your best Julia Child voice? Today was Julia Child’s 100 birthday, to celebrate I thought I would try to make something out of her first cookbook. I know Julia’s gotten quite a bit of play over the last few years, largely in part to the movie, Julie and Julia. I did like the movie, and I had previously read both books that inspired the movie. Did you know it is based on two books? The first is, My Life in France by Julia Child and Alex Prud’Homme,  is a wonderful story detailing much of Julia and Paul Child’s life overseas and in France. Basically all the Julia parts in the movie were based on this book. I highly recommend reading it! The other book is, Julie and Julia by Julie Powell, detailing Julie’s year cooking every recipe in Julia Child’s cookbook, Mastering the Art of French Cooking and blogging about it. An o.k. book, but I think I’m just cheesed off that I didn’t think of it first. For me I found Julie Powell a little unsavory as a person, thus I didn’t like her book as much. Then they have Amy Adams play her character in the movie and she’s adorable so it’s hard to not like her. I did read Julie Powell’s second book, Cleaving, and I’m a little ashamed to say that I wrote such a scathing review on Goodreads about it, I feel just a little guilty. Then again, I had to waste my time reading the book.

I digress, I’m here to celebrate Julia, so I used her pate choux recipe and made cream puffs. I used a filling recipe from Flour by Joanne Chang, what she uses in her eclairs and cream puffs. Then I topped it with a simple chocolate ganache, 1 part cream to 2 parts chocolate. The whole project left me a little harried because I decided to bake on the same day I had to clean the whole house and it was 100 degrees outside. Yikes, but I really shouldn’t complain, I got to eat a cream puff.

The things I do for you Julia!

Making the custard base for the filling.

I have to be honest here, I have made this filling before, but this time I found that it turned out very gummy. It tasted good and it wasn’t grainy. It was very firm after it chilled, so I ended up throwing it in my mixer and adding some cream to loosen it up a bit. It had to be soft enough to fold in with whipped cream. Luckily the fix worked.

Making the pate choux. Easier than you think!

The puffs, before and after baking. Success!

This is the filling, the custard mixed with whipped cream, then piped in the into the puffs.

Bon appetit and happy birthday to a wonderful lady!

One of my girls, licking her plate clean.

In my last post I may have mentioned that I was going to attempt to have a garage sale with only 3 days to prep. I have since seen reason and decided to have it in September. I’m not totally crazy! Next post I’m sharing a chili recipe with you that has finally gotten my husband’s approval. It only took ten years to find it!

Did I do anything this week?

I don’t think I did any Pinterest recipes this week. I got a stack of Everyday Food magazines for free, so I ended up raiding those for recipes.  Seriously, did I do anything this week, except try not to lose my mind? A normal day usually consists of breaking up a few twin fights, but throw a 9 year old boy into the mix and things can get interesting. I do enjoy seeing my nephew, but by Friday, the kids were getting a little used of each other so fighting was becoming more and more frequent. Throw my 35 year old somewhat excitable down syndrome sister into the mix, let’s just say I haven’t had a lot of time for extra curricular activities. Thanks goodness for weekends (nephew with his pops), naps/quiet time (twin A is asleep, twin B happily playing in play room), Harry Potter marathons (sis is happily watching) and VH1 top 100 songs of the 90’s (great background music for blogging)!

Here’s my nephew…asleep in a box.

I did clean up my craft room, if you’re lucky enough to have a crafting space all your own, you know how it’s in a constant state of mess. The severity of the mess is what is up for debate. After volunteering at my church garage sale, my craft room became the dumping grounds of any new treasure I found and anything that my husband didn’t know what to do with. It’s clean now and with my sewing machine in the shop for some sort of mysterious sickness (*sniff*), perhaps it will stay decent for a little while. I didn’t start any new projects this week, but I finished a few, which as you know can be a challenge!

I attached hardware on this vintage letterpress tray and hung it up for a new thread holder. I love it, much more room!

I did see this pin I found on Pinterest awhile ago. I was thought it was such a cute dress and then I realized I owned the pattern and had even cut out the dress, just didn’t sew it yet. Do you ever do that? Luckily I finished it this week.

I finally finished this dress for my friend’s daughter. I had cut extra fabric for a second bow for a matching headband. I still have to make the companion doll dress. Give me another year.

This is what my machine is doing. See how the straight stitch is wonky? That’s not going to work for me.

Hopefully they can fix the wonky stitch on the machine. I have a lot of projects coming up and I can’t really shell out the clams for a new machine. One of the projects I want to do is make a new carry on bag for our upcoming trip to California. I have several serviceable bags I could use, but what’s more fun staying up late, sweating, bleeding and swearing over an ambitious sewing project? Nothing, that’s right. I have thought about hitting a discount store and looking for a Pan Am like, weekender retro inspired bag. I love those things, you don’t even know, it’s probably the main reason I watched the show. Here are my two options. Let me know what you guys think! Bag A or Bag B? It will used to haul a bunch of snacks and entertaining items for the twins.

Bag A or Bag B?

I hope you all have a wonderful week! I’m hoping to have a garage sale next weekend with only 4 days to prep for it. Did I mention I’m a little crazy?


Weekly Pinterest Successes and a Fail Update

Today was the last day of volunteering at my church garage sale, what a ride! I have to say it was a lot of hard work but any excuse to organize crap that isn’t my own is a win in my book. Now, since I’m all motivated and on an organizational high, let us hope that I can use it on the garage and my craft room.

Remember the seed bomb project I did a few weeks ago? I wasn’t sure if it would be successful because some of the seed bombs had started molding. I was testing them for a friend as a possible wedding favor. Well I planted a couple of the moldy ones and guess what happened?

It grew! Success!

We ended up making another couple of batches and added less water, making it almost a damp crumble, but still easy to roll into a clay ball. Over two hundred seed bombs later, three people and staying up till almost 3am, we got them all done and packaged up. So I would say this Pinterest project became a success!

All done!

I had a meeting for Demarle at Home this week, which means cupcakes. I always bring cupcakes, sometimes a cake, but if I don’t show up with something they may not let me in! Not really! I really do it for selfish reasons, I love to bake and I love to see people enjoying my food. So I’m not doing them any favors really, all my guinea pigs and food testers are helping me. I’ve been eying a particular cupcake recipe on Pinterest, but was waiting for blueberry season. So here is the  link to the wonderful recipe for lemon blueberry cupcakes with a lemon curd filling and a mascarpone frosting from There Goes Cupcake.

Get in my belly!

I only changed a few things, and got a yummy cupcake. This is a big recipe and will make 2 dozen cupcakes. I ended up baking a pan of 20 mini muffin cupcakes and about 10 full size cupcakes. I followed her cupcake and frosting recipe and I made a 1.5 version of the lemon curd. She suggested doubling it if you like a lot of filling, but it would have taken 12 egg yolks and I had to leave a few eggs for breakfast!

Lemon curd at proper consistency, coats a back of a wooden spoon.

I had leftover lemon curd anyway and no complaints from me. It took all my self control to not eat it with a spoon…in front of my fridge…with the door open. I also had a lot of leftover frosting, since my family was visiting, I thought I would bake a cake mix cake and fancy it up with some of my leftovers yummies. When I made the lemon curd, I sieved it and was left with a pile of candied lemon zest. I saved it and added it into my cake mix giving it a little extra zing. I also beat the heck out of my cake mixes in my stand mixer, waiting until they turn pale yellow before I bake them. I think it gives them a lovely pound cake like texture. Pour, bake, unmold, slice in half, fill with lemon curd, decorate with leftover frosting and raspberries! Delicious!

Homemade frosting and filling do so much for a cake mix!

The last Pinterest recipe I made this week was lemony shrimp salad with couscous, I ran out of regular couscous and had to sub in the dreaded Israeli couscous. Luckily my twins know not to stick it up their noses now, they have not forgotten the extraction balloon up the nose. For this recipe I cooked the couscous in boiling water for a few minutes until tender and mixed in with the remaining ingredients. It was super fast and delicious. I would definitely make this one again, but I would suggest making it a day ahead of time  or earlier in the day so the flavors have time to absorb. The leftovers were great, so much in fact that I forgot to take a picture of it, we ate it too fast!

Wish me luck this week, I will be watching my nephew all week, as well as my twins and then my sister (who has Downs syndrome and needs constant supervision)  later this week and all weekend! It will be a rambunctious full house here this week! Let us hope I can get some of them to nap! Have a wonderful week!

Weekly Pinterest Successes

This week has been an interesting week to say the least. My husband has been taking vacation and staying home with the kids while I go to our church to volunteer. Definitely a reversal of roles, but he’s been keeping the girls busy by taking them all over the place, even a three mile trek one day. That’s a lot for little three year old legs!

I’ve been busy at our church, sorting through piles of items donated for our garage sale benefiting a school in Haiti. I’ve been coming home tired and dirty. So it’s a miracle that I have any Pinterest projects to show for myself!

A couple few weeks ago I tried a recipe from Eat Yourself Skinny for some amazing beef short ribs. I thought I would try another of her recipes for a Tuscan Pasta with Tomato-Basil Cream, which she posted over at the Food Mentalist. While the flavor of the finished dish was good, I had a couple issues with the preparation, mainly the addition of a flour after most of the sauce was made. Against my better judgment I followed the directions and was left with some gummy flour lumps in the sauce, not so cool. The girls didn’t like the dinner at all, I did, but I’m not sure I would make it again as is. That same night I had to process an entire flat of raspberries and few pounds of peaches. It wouldn’t have been so bad if I hadn’t had to wait for my husband to get home from a much needed man date with his brother. I was completely our of jars and he had to make a late night trip for them on his way home. Let’s just say my head didn’t hit the pillow until 2am, but I did have 4 pints of chocolate raspberry sauce and 5 pints of natural fruit raspberry peach amaretto spread. Yum!

So you know those taco cups from my last post? Yeah, I made them again this week. They’re just so tasty, plus I still had some won ton wrappers that needed to be used up. I did try something new, a Mexican stuffed pepper with quinoa and black beans. I thought it was delicious, the kids frowned on it (they’re three, what do they know!) and my husband thought it was good until he realized it had quinoa in it. I’ve been trying to sneak it in his diet more, but the texture always gives itself away to him. Despite my family’s oppositions, I thought it was a great vegetarian, low carb dish.

Yummy and healthy!

The last thing I was able to squeeze in this week was a banana pudding for a crowd. I only pull this one out when I know there is going to be a lot of people there to eat it! I must admit that I’m not the biggest fan of bananas. Then last summer when my husband and I went to NYC we went to Magnolia bakery, famed for it’s cupcakes. I don’t even remember what I ordered on our first visit, I do remember ordering my husband a slice of banana cream pie. He gave me a bite and I about died it was so good. Later on our second and third visits we opted for the banana pudding which they just scoop into pint containers. Anything that is made and served from a huge rubbermaid container that I would store things in under my bed is a win in my book. They must go through pounds of stuff. Once we returned back home, I immediately hit google up for the recipe, found it and pinned it. I was shocked by how easy it was. Not to mention, the real secret to a good banana pudding is using a vanilla pudding base and fresh bananas. Never depend on your banana flavor from an artificially flavored powder!

Magnolia Bakery’s Banana Pudding

Serves a lot or 12 really hungry people

  • 1 (14-ounce) can sweetened condensed milk
  • 1½ cups ice cold water
  • 1 (3.4-ounce) package instant vanilla pudding mix (preferably Jell-O brand)
  • 3 cups heavy cream
  • 1 (12-ounce) box Nabisco Nilla Wafers (no substitutions!) I buy two boxes, you will need them!
  • 4 cups sliced ripe bananas I don’t bother measuring. I just cut them up as I need them, it helps prevent premature browning.

Getting ready to assemble.

In your mixer or using a hand mixer, beat together the sweetened condensed milk and water until well combined, about 1 minute. Add the pudding mix and beat well, about 2 minutes more. Cover with plastic wrap, keeping it flush with the pudding to prevent a skin and refrigerate for 3-4 hours or overnight, before continuing. You really need to let the pudding set. If you’re a gambler, you can refrigerate for 15 minutes and then put in the freezer for 15 minutes and then use.

In a large bowl, on the medium speed of an electric mixer, whip the heavy cream until stiff peaks form. Gently fold the pudding mixture into the whipped cream until well blended and no streaks of pudding remain.

Gently fold the whipping cream and pudding together.

To assemble the dessert, select a large, wide bowl (preferably glass) with a 4-5-quart capacity. I opt for a big round rubbermaid container. It’s not as pretty, but I’m usually transporting this to a big event. Arrange one-third of the wafers to cover the bottom of the bowl, overlapping if necessary, then one-third of the bananas(I just slice these as I go) and one-third of the pudding. Repeat the layering twice more, garnishing with additional wafers or wafer crumbs on the top layer of the pudding. Cover tightly with plastic wrap (or slap that lid on) and allow to chill in the refrigerator for 4 hours – or up to 8 hours – before serving. The pudding does need the 4 hours. I tried to rush it and the cookies weren’t all the way tender. After 8 hours the bananas start to brown, making them a little unsightly, but most people won’t care. They’ll be too busy stuffing their faces, seriously, they will.

Just give me a spoon.

20120729-235819.jpg

Weekly Pinterest Wrap Up, only one day late.

What a busy weekend and it’s only going to get busier this coming week! Last weekend I was finally able to tackle my dining room closet. Do you remember that episode of friends where Chandler breaks into Monica’s storage closet and finds a huge slobby mess? Yes, that’s me. Don’t judge me to harshly.

Ack!

Less than 24 hours later, demoed, spackled, painted and new system up!

Ahh! It’s not even full!

I’m volunteering at our annual church garage sale and I’m using the term garage sale loosely. It’s huge and it takes lots of help to get that thing put together. For me it lets me volunteer a bit for a good cause and it gets me out of the house, which is good for my sanity. Today was my first day and when I came home, I was treated with, “Hey mom, you’ve been gone all day so we’re going to concentrate the whole days emotions in a couple of  hours.” Ugh. The twins are finally in bed and asleep. My husband is on a man date with his brother, something he doesn’t get to do very often. The house is quiet, so enter the click clacking of my laptop keys.

Last week was a busy week for Pinterest inspired recipes. The first was my cauliflower pizza crust, detailed in my last post. Tuesday I took to girls to Mt Tabor park with the ladies and we enjoyed alfresco dining, wine and the Vagabond Opera. Everyone, brought a little something, my friend over at Lula Harp, brought an Israeli couscous salad. I have a history with Israeli couscous. Formally it was a delicious easy meal, then the twins decided it would be a good idea to stick some up there noses. Enter a late night urgent care visit with both girls, oh, and my husband was away on business. I was not pleased, Lula can’t stop laughing about it. I brought some chocolate cake and my pinterest recipe, taco cups. The first time I made the taco cups I misread the directions and made them in full size muffin cups, so they were a little flat. This time I made them in my Demarle mini muffin pan and they turned out wonderful! I topped them with avocado tossed with lime juice, sour cream and cilantro. They were perfect bite sized picnic snacks!

Yum in a cup!

Another Pinterest recipe wasn’t really a specific recipe as much as a lovely looking picture, this one to be exact.

How amazing does this look? (photo by Proud Italian Cook)

I picked up some Walla Walla sweet onions from the farmers market and grilled them then and doctored them up ala Proud Italian Cook with some basalmic, and Gorgonzola. Delicious!

The last recipe I got off Pinterst months ago and have changed it around to suit my needs. Last Wednesday we were greeted by a dreary gray day and I was struck with a yearning for Fall. I know, it’s not even August yet, but I’m so ready for pumpkins, colder weather, apples, cinnamon…

So I was inspired to whip up my Baked Potato soup. It’s so comforting and the whole family just slurps it up!

Top with your favorite baked potato fixings. I like cheddar cheese, green onions and turkey bacon.

Baked Potato Soup

  •  6-8 gold potatoes varied sizes (peeled and cubed)
  • 4 cups chicken stock
  • 1 onion (chopped)
  • 4 cloves of garlic (chopped)
  • 2 cups milk
  • 1 cup half and half
  • salt and pepper to taste
  • 1 stick unsalted butter
  • toppings of your choice

In a large stock pot or dutch oven, melt butter and cook onions and garlic until softened. Add potatoes and chicken stock, cover and simmer until potatoes are soft, about 30 minutes. Using an immersion blender, puree the soup to desired consistency. Pour in the milk and cream and mix to combine. Salt and pepper to taste, you can also add a dash of cayenne pepper if you like some heat! Heat through and serve with toppings of your choice!

An immersion blender makes this so easy. I also like to precook and cut all my toppings ahead of time and serve them in the storage dish for an informal dinner.

Hope you all have a wonderful week!